HIGHWAY QUALITY TEST
Precision Testing. Proven Quality. Safer Infrastructure.
Precision Testing. Proven Quality. Safer Infrastructure.
Table of Contents
ToggleThis is Part 2 of the Prime Coat Construction Methodology series and is a continuation of Part 1. This part covers the remaining methodology from Sl. No. 12 to Sl. No. 29, including the application procedure, quality control requirements, inspection points, curing, acceptance criteria, common defects, preventive measures, and best construction practices as per MoRTH Specifications.
The Tray Test is the most reliable field method used to verify the actual Prime Coat application rate delivered by the bitumen pressure distributor. Although the distributor may already be calibrated, the tray test confirms that the required quantity of SS-1 Grade Cationic Bitumen Emulsion is being uniformly applied under actual site conditions.
The tray test shall be carried out before the commencement of spraying and thereafter at regular intervals during production, particularly after changing the spray pressure, vehicle speed, spray nozzles, or any major maintenance of the distributor. The measured application rate shall comply with the approved spray rate specified in the project Quality Assurance Plan (QAP) and MoRTH Clause 502.
| Parameter | Value |
|---|---|
| Tray Size | 300 mm × 300 mm |
| Tray Area | 0.09 m² |
| Collected Emulsion | 22.5 g (0.0225 kg) |
| Calculated Spray Rate | 0.0225 ÷ 0.09 = 0.25 kg/m² |
| Result | Within Specified Limits ✔ |
| Observation | Possible Cause | Corrective Action |
|---|---|---|
| One tray contains very little emulsion | Blocked nozzle | Clean or replace the nozzle. |
| One tray contains excessive emulsion | Damaged or oversized nozzle | Replace the nozzle. |
| All tray values are higher than specification | Vehicle speed too low or pump pressure too high | Increase vehicle speed or reduce pressure. |
| All tray values are lower than specification | Vehicle speed too high or pump pressure too low | Reduce speed or increase pressure. |
| Tray readings vary considerably | Incorrect nozzle alignment or spray bar height | Adjust spray bar height and nozzle angles, then repeat the tray test. |
Many fresh engineers believe that the average spray rate alone is sufficient. In actual highway construction, the uniformity of individual tray readings is equally important. For example, an average of 0.25 kg/m² may appear acceptable, but if one side of the spray bar applies 0.35 kg/m² and the other side applies only 0.15 kg/m², the pavement will experience non-uniform bonding, leading to localized failures. Therefore, always review each tray reading, not just the average.
On major projects, experienced engineers conduct a tray test immediately before the first day's production and again whenever there is a change in pump pressure, spray nozzles, vehicle speed, or emulsion source. Spending 15–20 minutes on a tray test can prevent hundreds of metres of improperly primed pavement and avoid expensive rework.
The spray bar height is one of the most important factors affecting the uniformity of Prime Coat application. Even if the pressure distributor is properly calibrated and the vehicle speed is maintained correctly, an incorrect spray bar height can produce streaking, excessive overlap, untreated strips, or non-uniform application of the bitumen emulsion.
The spray bar shall be adjusted so that the spray fans from adjacent nozzles overlap uniformly over the pavement surface. Proper overlap ensures that every part of the pavement receives the specified quantity of emulsion without excess or deficiency.
Each nozzle produces a fan-shaped spray pattern. When the spray bar is set at the correct height, the spray fans overlap uniformly, resulting in a continuous and even application across the full pavement width. Incorrect spray bar height leads to uneven binder distribution, which adversely affects the bonding between pavement layers.
| Parameter | Recommended Practice |
|---|---|
| Nozzle Angle | 15°–30° to the spray bar (as recommended by manufacturer) |
| Nozzle Spacing | Generally 100 mm (or as per equipment manufacturer) |
| Spray Bar Height | Adjusted to obtain double or triple overlap of adjacent spray fans |
| Spray Pattern | Uniform fan-shaped overlap across entire pavement width |
| Condition | Effect on Spray Pattern | Possible Pavement Problem |
|---|---|---|
| Spray Bar Too Low | Spray fans do not overlap adequately. | Untreated strips, poor bonding, localized delamination. |
| Spray Bar Too High | Excessive overlap of spray fans. | Over-application, streaking, bleeding and tracking. |
| Correct Height | Uniform overlapping spray pattern. | Uniform bonding and proper prime coat performance. |
| Problem | Possible Cause | Corrective Action |
|---|---|---|
| Visible untreated strips | Spray bar too low | Increase spray bar height. |
| Dark streaks across pavement | Spray bar too high | Reduce spray bar height. |
| Uneven spray width | Bent spray bar | Repair or realign spray bar. |
| Random spray pattern | Blocked or damaged nozzles | Clean or replace nozzles. |
A common misconception among fresh engineers is that the spray bar height is fixed for every project. In reality, the correct height depends on the nozzle type, nozzle spacing, and manufacturer's recommendations. Never adjust the spray bar based on visual judgement alone—always verify the spray pattern through a trial spray or tray test before production.
Experienced highway engineers rarely begin production immediately after adjusting the spray bar. They first perform a short trial spray of 5–10 metres, inspect the spray fan overlap, check for streaking or missed strips, and only then permit full-scale spraying. This simple practice prevents large areas from receiving a non-uniform prime coat and significantly reduces rework.
Quality Control during Prime Coat application is a continuous activity and should not be limited to checking the spray rate alone. Throughout the spraying operation, the site engineer, QA/QC engineer, laboratory engineer, and equipment operator shall continuously monitor the work to ensure compliance with MoRTH Clause 502, approved construction methodology, and project specifications. Immediate corrective action shall be taken whenever any deviation is observed.
On NHAI, EPC, and HAM highway projects, continuous inspection during spraying prevents defects such as non-uniform penetration, ponding, streaking, inadequate coverage, contamination, and poor bonding with the overlying bituminous layer.
Observe the pressure distributor throughout the spraying operation. Ensure that the spray pressure remains constant and all nozzles continue to discharge uniformly. Any nozzle blockage, pressure fluctuation, or leakage shall be rectified immediately by stopping the spraying operation.
The engineer shall continuously inspect the sprayed surface to ensure that the prime coat has been applied uniformly over the entire pavement width. The surface shall appear evenly coated without untreated strips, excessive binder accumulation, or overlapping marks.
If any untreated area is noticed, it shall be immediately corrected by controlled manual spraying before curing begins.
The actual application rate shall be verified periodically using the approved Tray Test or other calibrated field method. Random checks should be carried out at regular intervals during production to ensure that the pressure distributor continues to apply the specified quantity of binder.
| Inspection Item | Recommended Frequency |
|---|---|
| Tray Test | At commencement and periodically during production |
| Spray Pattern Check | Continuous visual inspection |
| Nozzle Inspection | Before each run and whenever abnormalities are observed |
| Vehicle Speed | Continuous monitoring |
The applied prime coat should penetrate into the surface voids of the prepared granular base rather than remaining entirely on the surface. Adequate penetration indicates proper surface preparation and correct application rate.
Poor penetration may indicate:
Immediately after spraying, ensure that no dust, soil, loose aggregate, or construction debris contaminates the primed surface. Construction vehicles, labour movement, and equipment crossing the treated area shall be strictly controlled until curing is complete.
Inspect all overlaps between adjacent spray passes. Excessive overlap produces localized over-application, whereas insufficient overlap leaves untreated strips that may cause poor bonding with the overlying bituminous layer.
At transverse joints, ensure clean cut-offs and proper masking to avoid excess binder accumulation.
Throughout spraying operations, continuously monitor weather conditions. Spraying shall be stopped immediately if rainfall commences or if strong winds begin to distort the spray pattern.
All observations made during spraying shall be entered in the Quality Control Register or Daily Inspection Report. Proper documentation ensures traceability and demonstrates compliance with project specifications.
| Record | Purpose |
|---|---|
| Date & Chainage | Work location identification |
| Weather Conditions | Verification of suitable spraying conditions |
| Material Batch Number | Material traceability |
| Spray Rate | Compliance with MoRTH requirements |
| Tray Test Results | Calibration verification |
| Engineer Remarks | Acceptance or corrective actions |
Never assume that the pressure distributor is applying the correct quantity throughout the day simply because it passed the initial calibration. Continuously observe the spray pattern, vehicle speed, nozzle performance, and pavement appearance during every spray run. Most field defects are detected visually before they appear in laboratory records. A vigilant site engineer can prevent costly rework by identifying problems immediately rather than after the bituminous layer has been laid.
After the Prime Coat has been sprayed uniformly over the prepared granular base, it shall be allowed sufficient time to break and cure before the first bituminous layer is laid. Proper curing is one of the most critical stages of prime coat application because it allows the bitumen emulsion to penetrate the granular surface, evaporate the water, and develop a strong bond with the base course.
Many premature pavement failures, including poor adhesion, stripping, delamination, bleeding, and pickup of binder by construction traffic, are directly associated with inadequate curing. Therefore, no Dense Bituminous Macadam (DBM), Bituminous Macadam (BM), or other bituminous layer shall be laid until the Engineer confirms that the prime coat has completely broken and cured.
Bitumen emulsion consists of bitumen, water, and an emulsifying agent. Immediately after spraying, the emulsion appears brown in colour. As the water evaporates and is absorbed by the granular base, the emulsion gradually separates, allowing the residual bitumen to adhere firmly to the aggregate particles. This process is known as the breaking of the emulsion.
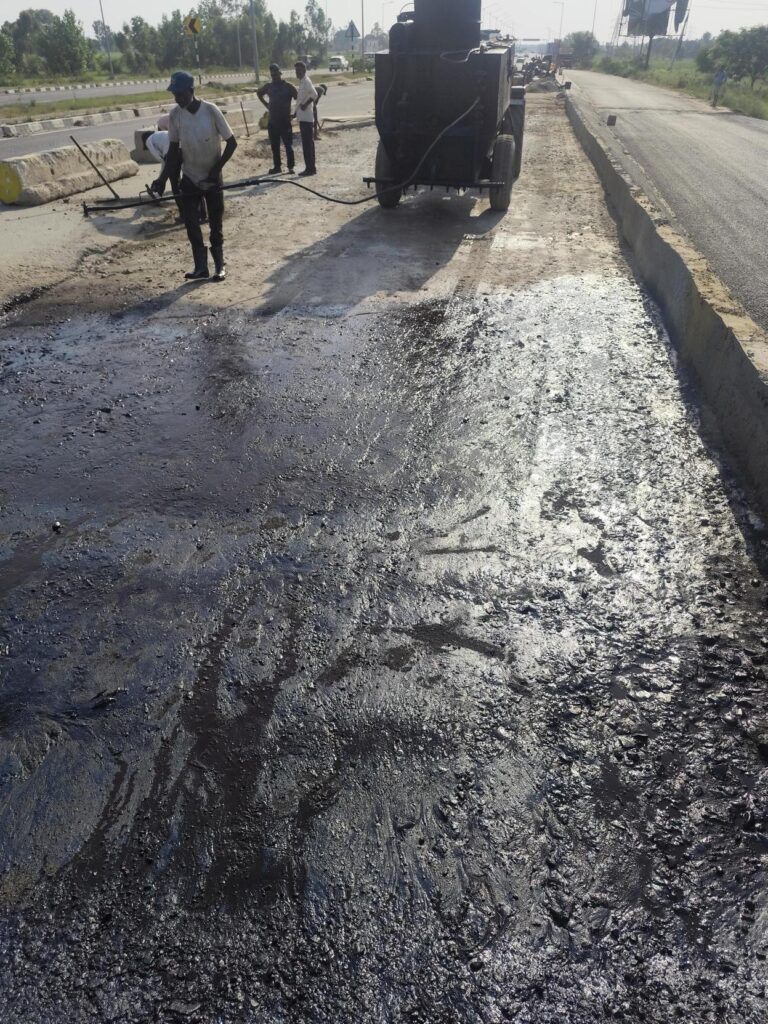
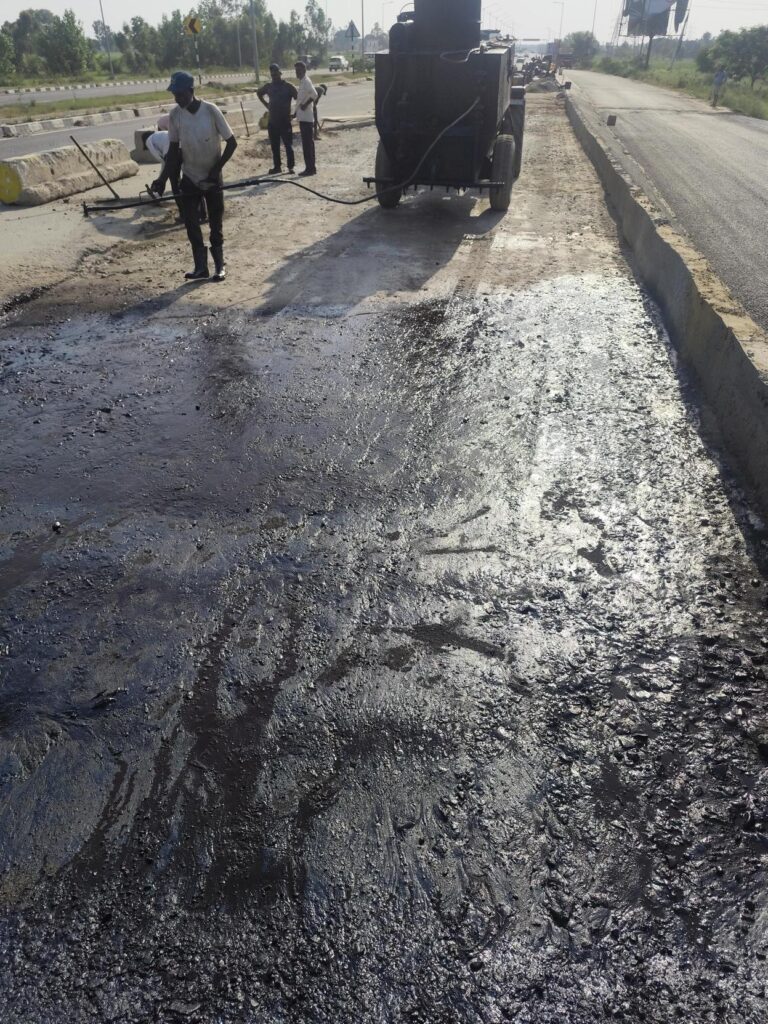
After complete breaking, the surface changes from brown to a uniform black colour, indicating that the residual bitumen has formed a continuous film over the granular surface.
Think of the water in the emulsion as the carrier that helps spread the bitumen evenly. Once the water evaporates, only the bitumen remains bonded to the road surface. Until this process is complete, the prime coat is not ready to receive the asphalt layer.
| Stage | Surface Appearance | Site Condition |
|---|---|---|
| Immediately After Spraying | Brown, wet surface | Freshly sprayed emulsion with high moisture content. |
| Breaking Stage | Brown changing to dark brown | Water evaporates and emulsion starts separating. |
| Fully Broken | Uniform black appearance | Residual bitumen has adhered to the granular surface. |
| Ready for DBM | Black, non-tracking, slightly tacky | Suitable for laying the first bituminous course. |
The time required for complete curing depends upon several environmental and site conditions. Under favourable weather conditions, curing generally occurs within a few hours; however, adverse weather may considerably delay the process.
| Factor | Effect on Curing |
|---|---|
| High Temperature | Accelerates breaking and curing. |
| Low Temperature | Delays curing process. |
| High Humidity | Slows evaporation of water. |
| Strong Wind | Speeds up drying and curing. |
| Heavy Spray Rate | Requires longer curing time. |
| Highly Porous Surface | Absorbs emulsion faster, improving penetration. |
Before allowing the paving machine to enter the primed surface, the Site Engineer and QA/QC Engineer shall verify that the prime coat has cured completely and is suitable for receiving the bituminous layer.
| Mistake | Likely Consequence |
|---|---|
| DBM laid before curing | Poor bond and stripping. |
| Traffic allowed too early | Tracking and contamination. |
| Dust deposited after spraying | Reduced adhesion. |
| Excessive spray rate | Delayed curing and bleeding. |
| Rainfall before curing | Wash-off and inadequate penetration. |
Never decide that the prime coat is cured based only on elapsed time. Always inspect the actual surface condition. If the surface is still brown, wet, or transfers binder to shoes or tyres, it has not cured adequately. On major highway projects, the Engineer's approval should be obtained before permitting the paving machine to commence Dense Bituminous Macadam (DBM) laying.
After the Prime Coat has been applied, it is essential to protect the treated surface until the first bituminous layer is laid. The residual bitumen film remains susceptible to damage, contamination, and displacement during the curing period. Therefore, effective traffic control and surface protection measures shall be implemented in accordance with MoRTH Specifications, approved traffic management plans, and the Engineer's instructions.
On highway construction projects, one of the most common reasons for poor bonding between the granular base and the first bituminous layer is premature movement of vehicles over an uncured prime coat. Tyre marks, dust contamination, and loss of binder significantly reduce the effectiveness of the prime coat and may lead to premature pavement failures.
The objective of traffic control after prime coat application is to ensure that the treated surface remains undisturbed until complete curing has occurred and the overlying bituminous course is ready for paving.
Immediately after spraying, all unnecessary movement of construction vehicles, labour, and equipment shall be prohibited over the primed surface. Barricades, warning signs, safety cones, and flagmen shall be deployed to prevent accidental entry.
Only authorized personnel involved in quality inspection may enter the treated area, and that too only when absolutely necessary.
| Traffic Type | Permission | Remarks |
|---|---|---|
| General Public Traffic | ❌ Not Allowed | Until approved by Engineer. |
| Construction Equipment | ❌ Avoid | Only if absolutely essential. |
| Paver for DBM | ✔ Allowed | Only after complete curing and Engineer's approval. |
The primed surface shall remain clean until the first bituminous layer is placed. Dust generated by nearby earthwork, haul roads, shoulders, or construction activities may adhere to the tacky surface and significantly reduce bonding.
The Site Engineer shall ensure that nearby operations likely to generate excessive dust are either suspended or properly controlled during the curing period.
Prime coat shall not be applied when rainfall is expected during the curing period. If rain occurs before complete breaking of the emulsion, the Engineer shall inspect the surface carefully to determine whether re-application is necessary.
Any washed-off or damaged areas shall be cleaned and re-primed before laying the bituminous layer.
If any portion of the primed surface becomes contaminated, damaged by traffic, or loses its uniform appearance, the affected area shall be repaired before paving.
| Observed Defect | Corrective Action |
|---|---|
| Tyre Marks | Clean surface and reapply prime coat where necessary. |
| Dust Contamination | Remove loose dust and reprime if required. |
| Binder Pickup | Allow additional curing or repair affected areas. |
| Rain Damage | Engineer to inspect and order local or full reapplication. |
The Site Engineer shall continuously monitor the primed surface during the curing period and ensure that no unauthorized vehicle enters the treated area. Regular patrols should be carried out until paving commences.
| Common Mistake | Impact on Pavement |
|---|---|
| Construction vehicles allowed during curing. | Tyre pickup and damaged prime coat. |
| Shoulder work carried out simultaneously. | Dust contamination. |
| Rainwater not drained. | Loss of penetration and poor bonding. |
| Paving started without inspection. | Weak interface between pavement layers. |
On most EPC highway projects, prime coat is generally sprayed one day before DBM laying whenever weather conditions permit. This provides sufficient time for proper curing and allows the QA/QC Engineer to inspect the entire surface before paving. If the surface becomes dusty overnight, it should be lightly cleaned using an approved air compressor before allowing the paver to proceed, subject to the Engineer's approval.
Remember that a properly applied prime coat can still fail if it is not protected after spraying. Your responsibility does not end when the pressure distributor leaves the site. Continue monitoring the pavement until the paver begins laying the first bituminous layer. Good traffic control is just as important as correct spraying.
Before commencement of Dense Bituminous Macadam (DBM) or any other first bituminous layer, the Prime Coat shall be inspected thoroughly by the Site Engineer, QA/QC Engineer, Survey Team, and the Engineer/Authority's Representative. The purpose of this inspection is to confirm that the primed surface complies with the requirements of MoRTH Clause 502, approved construction methodology, and project specifications.
No paving operation shall commence until the Engineer has accepted the primed surface. If any defects such as contamination, ponding, incomplete curing, insufficient penetration, or damage due to construction traffic are observed, they shall be rectified before permitting the paver to enter the work area.
| Inspection Item | Acceptance Requirement | Status |
|---|---|---|
| Prime Coat Cured | Uniform black appearance with no free moisture. | ✔ Accept |
| Surface Cleanliness | Free from dust, soil, loose aggregate, mud, and debris. | ✔ Accept |
| Application Uniformity | No streaking, ponding, untreated patches, or excessive overlap. | ✔ Accept |
| Surface Penetration | Prime coat adequately penetrated into the granular surface. | ✔ Accept |
| Traffic Damage | No tyre marks or damaged areas. | ✔ Accept |
| Weather Condition | Dry weather suitable for paving. | ✔ Accept |
| Approval from Engineer | Permission obtained before paving starts. | ✔ Accept |
The Engineer shall visually inspect the entire carriageway before permitting the paving machine to commence work. The surface should exhibit the following characteristics:
| Observed Defect | Recommended Corrective Action |
|---|---|
| Dust on Surface | Clean using approved air compressor before paving. |
| Tyre Marks | Repair affected area and reapply prime coat if required. |
| Incomplete Curing | Allow additional curing time. |
| Untreated Area | Apply additional prime coat by approved manual spraying. |
| Ponding of Binder | Remove excess binder as directed by the Engineer. |
| Rain Damage | Inspect thoroughly and re-prime damaged locations if necessary. |
| Document | Purpose |
|---|---|
| Granular Base Approval | Confirmation that the underlying layer has been accepted. |
| Material Test Reports | Verification of emulsion quality. |
| Pressure Distributor Calibration | Verification of application rate. |
| Tray Test Records | Confirmation of spray quantity. |
| Daily Inspection Report | QA/QC documentation. |
On most L&T ECC, APCO, Afcons, and other NHAI highway projects, the paving crew is often ready before the QA/QC inspection is completed. Never allow the paver to enter the work area under production pressure. Spend five minutes inspecting the prime coat because repairing a failed pavement interface after DBM has been laid is far more expensive than delaying paving for a short period.
The Prime Coat is hidden forever once the DBM layer is laid. If any defect remains unnoticed at this stage, it cannot be corrected later without removing the asphalt layer. Therefore, this is the last opportunity to ensure proper bonding between the granular base and the first bituminous layer. A careful inspection today can prevent future failures such as slippage cracks, stripping, and delamination.
The Prime Coat shall be considered acceptable only when the surface is fully cured, uniformly black, free from contamination, properly penetrated, uniformly sprayed, and approved by the Engineer. Only after satisfying these conditions shall the paving machine be permitted to commence laying the Dense Bituminous Macadam (DBM) or other specified bituminous layer.
During prime coat application, several site-related issues may adversely affect the quality and long-term performance of the pavement. Early identification and immediate corrective action are essential to achieve proper penetration, uniform coverage, and satisfactory bonding with the overlying bituminous layer. The table below summarizes the most common problems encountered during prime coat operations and the recommended corrective measures.
| Problem Observed | Possible Cause | Corrective Action |
|---|---|---|
| Uneven spray pattern | Blocked nozzles or incorrect spray bar height | Clean nozzles, adjust spray bar height, recalibrate distributor. |
| Ponding of emulsion | Excess spray rate or slow vehicle speed | Reduce application rate and maintain constant distributor speed. |
| Dry untreated patches | Missed spray area or nozzle blockage | Respray affected areas immediately. |
| Poor penetration | Dusty surface or excessive moisture | Clean surface thoroughly and allow proper drying before spraying. |
| Slow breaking of emulsion | Cold weather, high humidity or over-application | Allow additional curing time and avoid excessive spray rate. |
| Binder picked up by vehicle tyres | Traffic allowed before complete breaking | Restrict traffic until emulsion has completely broken. |
| Dust contamination | Wind or construction traffic | Reclean surface and protect from traffic. |
Prime Coat is not merely a spraying operation. Its effectiveness depends on proper surface preparation, equipment calibration, correct spray rate, and adequate curing. Fresh engineers should understand that most prime coat failures are caused by poor execution rather than poor material quality.
| Inspection Item | Status (✓/✗) |
|---|---|
| Granular base approved | |
| Surface cleaned | |
| Loose material removed | |
| Surface moisture acceptable | |
| Weather suitable | |
| Pressure distributor calibrated | |
| Tray test completed | |
| Spray rate verified | |
| Uniform spraying achieved | |
| No streaking or ponding observed | |
| Complete emulsion breaking achieved | |
| Traffic restricted | |
| DBM permitted |
| Activity | Frequency |
|---|---|
| Material approval | Each lot |
| Distributor calibration | Before commencement and whenever equipment is adjusted |
| Tray test | At start of work and whenever spray rate changes |
| Visual inspection | Continuous |
| Weather monitoring | Throughout spraying |
| Surface cleaning | Entire area before spraying |
| Breaking of emulsion | Before laying DBM |
Inspect the prepared surface thoroughly. The granular layer shall be free from loose aggregates, segregation, potholes, depressions, rutting, oil contamination, mud, standing water, and other defects that may affect penetration or bonding.
Clean the entire surface using a mechanical power broom followed by an air compressor to remove dust and loose particles. Areas inaccessible to mechanical equipment shall be cleaned manually using brushes or approved methods.
Ensure that the granular surface is in the specified moisture condition. Remove all standing water and allow the surface to dry where necessary. Excessively wet or muddy surfaces shall not receive Prime Coat.
Prime Coat shall be applied only under favourable weather conditions. Spraying shall not be carried out during rainfall, fog, or strong winds. Weather conditions shall permit proper breaking and curing of the bitumen emulsion.
Position the calibrated bitumen pressure distributor at the starting point. Inspect the spray bar, nozzles, pressure gauge, pump, valves, hoses, and control system. Ensure that all spray nozzles are clean, correctly aligned, and functioning properly.
Use only approved SS-1 Grade Cationic Bitumen Emulsion complying with IS 8887 and project specifications. Verify the manufacturer's test certificate before use.
Verify the spray rate by adjusting the vehicle speed, pump pressure, spray bar height, and nozzle angle. Carry out a tray test or other approved calibration method to ensure compliance with the specified application rate.
Carry out a trial spray on a small area to verify spray uniformity, nozzle overlap, application rate, and equipment performance. Adjust the distributor settings if required before commencing production spraying.
Spray the Prime Coat uniformly while maintaining a constant vehicle speed and pump pressure. The spray bar shall remain at the correct height to ensure full-width coverage. The application rate shall comply with the requirements of MoRTH Table 500-3 or the approved Contract Documents.
Use a hand spray lance to treat locations that cannot be reached by the pressure distributor, including kerbs, medians, bridge approaches, drainage structures, and utility covers.
Continuously inspect the sprayed surface for streaking, ponding, missed areas, nozzle blockage, excessive overlap, and insufficient application. Any defective areas shall be corrected immediately.
Periodically confirm the actual spray rate by conducting tray tests or other approved field verification methods. Record all observations in the quality control register.
Allow sufficient time for the emulsion to break and cure. A properly cured Prime Coat changes from brown to black, penetrates the granular base, and does not stick to vehicle tyres.
Prevent contamination from dust, soil, fuel spills, and unnecessary traffic. Install barricades, warning signs, and traffic control devices until the first bituminous layer is placed.
The Engineer shall inspect the completed Prime Coat to verify uniform coverage, adequate penetration, proper curing, correct application rate, and absence of untreated areas, streaks, or puddles.
After obtaining the Engineer's approval, place the first bituminous layer such as Dense Bituminous Macadam (DBM), Bituminous Macadam (BM), or other specified asphalt course in accordance with the relevant MoRTH Specifications.
A properly executed Prime Coat in road construction requires an approved granular base, thorough surface cleaning, calibrated pressure distributor, correct spray rate, uniform application, adequate curing, and Engineer's approval before laying the first bituminous layer. Following the MoRTH Prime Coat procedure ensures proper bonding, reduced binder absorption, improved pavement durability, and long-term highway performance.
Engineering Precision. Digital Quality. Highway Excellence.
© 2026 HIGHWAY QUALITY TEST. All rights reserved.