Bitumen

COMPLETE BITUMEN TESTING EXCEL TOOLKIT

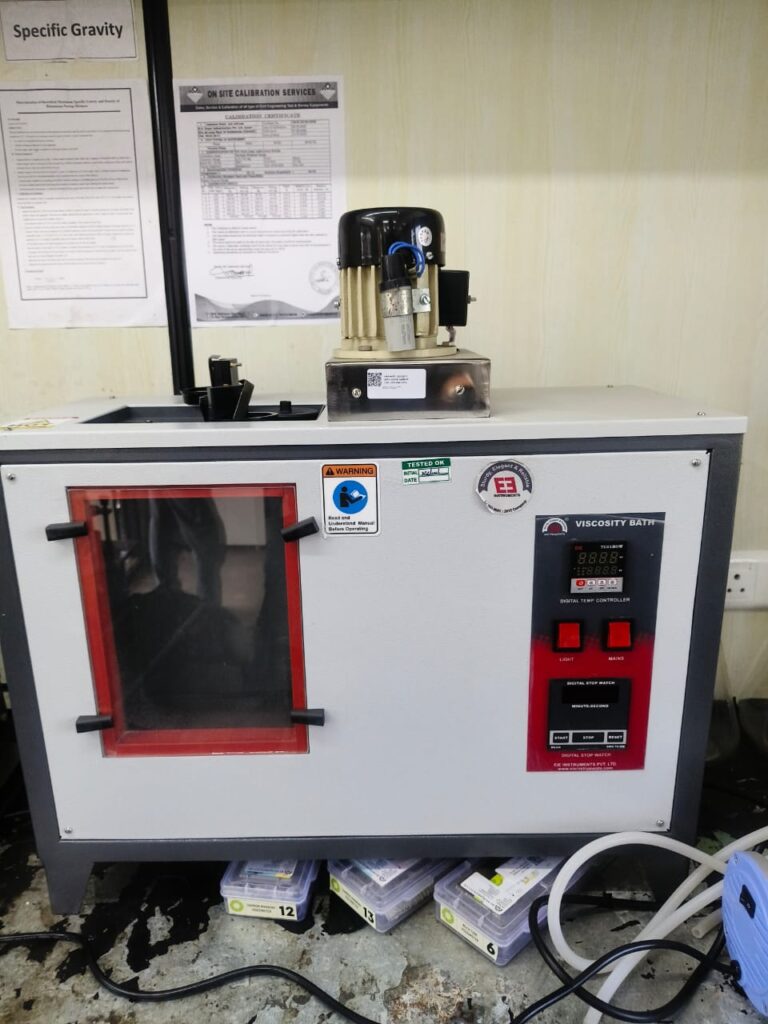
⭐ PREMIUM QA/QC EXCEL TOOLKIT Complete Bitumen Testing Excel Toolkit A practical collection of 10 ready-to-use Excel formats for bitumen testing, calculations, QA/QC documentation and laboratory reporting. ✓ Automatic Calculations ✓ Editable Excel ✓ QA/QC Reporting ✓ Lifetime Access WHY THIS TOOLKIT? Simplify Routine Bitumen QA/QC Work Bitumen testing involves repeated observations, calculations, temperature control, viscosity evaluation and documentation. These Excel formats are designed to make routine laboratory and site QA/QC work faster, more consistent and easier to review. 📋 10 Excel Formats Included Ready-to-use formats for common bitumen and bituminous binder laboratory testing and QA/QC requirements. ✓ Penetration Test (IS 1203) ✓ Specific Gravity Test (IS 1202) ✓ Softening Point Test (IS 1205) ✓ Absolute Viscosity Test (IS 1206 Part 2) ✓ Kinematic Viscosity Test (IS 1206 Part 3) ✓ Ductility Test (IS 1208) ✓ Flash & Fire Point Test (IS 1209) ✓ Solubility Test (IS 1216) ✓ Residue by Evaporation (IS 8887) ✓ Viscosity of Bitumen Emulsion (IS 8887) ⚡ Automatic Calculations Reduce repetitive calculations and improve consistency in routine bitumen test records. 📊 Test Calculations Structured worksheets for observations, calculations and test result evaluation. 📑 Reporting Formats Organized formats suitable for routine laboratory and QA/QC documentation. ✏️ Fully Editable Enter your project data and adapt the formats to your laboratory workflow. 👷 Who Is This Toolkit For? ✓ Highway & Infrastructure Projects ✓ QA/QC Engineers ✓ Laboratory Engineers & Technicians ✓ Site Engineers ✓ Consultants & Contractors ✓ Civil Engineering Students 🔧 Practical QA/QC Applications Bitumen Source Approval: Use structured test formats for recording and reviewing basic binder properties. Routine Laboratory Testing: Maintain consistent observation, calculation and reporting formats for regular bitumen testing. Binder Quality Control: Record penetration, softening point, viscosity, ductility and other relevant properties efficiently. QA/QC Documentation: Maintain organized test records for project quality documentation, review and traceability. 📚 Standards & Technical Basis The toolkit is prepared with reference to applicable Indian Standards for bitumen and bituminous binders, including relevant parts of the IS 1200 series and applicable standards such as IS 1202, IS 1203, IS 1205, IS 1206, IS 1208, IS 1209, IS 1216 and IS 8887, as applicable to the respective tests. Project specifications and applicable MoRTH requirements should be checked before acceptance. ❓ QUICK QUESTIONS Frequently Asked Questions Everything you need to know before purchasing the Bitumen Testing Excel Toolkit. What exactly is included in this toolkit? You receive 10 ready-to-use Excel formats covering penetration, specific gravity, softening point, viscosity, ductility, flash & fire point, solubility, residue by evaporation and bitumen emulsion viscosity. Are the Excel files editable? Yes. The formats are provided as editable Excel worksheets. You can enter your project and laboratory data and adapt the formats to your applicable testing and reporting requirements. Do the sheets contain automatic calculations? Yes. The applicable worksheets include formulas to reduce repetitive manual calculations and help maintain consistent test records. Can I use these formats for highway and infrastructure projects? Yes. The toolkit is designed for practical highway, bridge and infrastructure QA/QC work, including laboratory testing, routine quality records and bitumen evaluation. Always verify the applicable project specification before acceptance. Which standards are covered? The formats are prepared with reference to applicable Indian Standards for bitumen and bituminous binders, including relevant standards such as IS 1202, IS 1203, IS 1205, IS 1206, IS 1208, IS 1209, IS 1216 and IS 8887, as applicable to the respective tests. Applicable MoRTH specifications, project specifications and latest standards should be checked for acceptance criteria. Who can use this toolkit? It is useful for QA/QC engineers, laboratory engineers, site engineers, consultants, contractors, technicians and civil engineering students involved in bitumen testing and quality documentation. How will I receive the toolkit after payment? After successful payment, the toolkit is provided through the designated digital delivery process. You receive the Excel files for use on your computer or compatible device. Is this a one-time payment? Yes. This is a one-time purchase. There is no recurring subscription for this toolkit. Do I get lifetime access? Yes. The purchase includes lifetime access to the toolkit subject to the product’s delivery and access terms. Can these Excel formats replace the applicable test standard? No. The toolkit is a calculation and documentation aid. It does not replace IS, IRC, MoRTH, project specifications or approved laboratory procedures. The applicable standard and project requirements should always be followed for testing and acceptance. COMPLETE BITUMEN TESTING TOOLKIT Get All 10 Excel Formats Today ₹1,299 ₹499 SAVE ₹800 One-time payment • Instant Download • Editable Excel • Lifetime Access 🚀 Get Bitumen Toolkit – ₹499 🔒 Secure Payment   •   📥 Instant Access   •   📊 Editable Excel Formats   •   ♾️ Lifetime Access Prepared for practical QA/QC use with reference to applicable Indian Standards and project requirements.

COMPLETE BITUMEN TESTING EXCEL TOOLKIT Read More »

Bitumen
Asphalt Quantity Calculation (Step-by-Step Guide) 

      Part 10 – Asphalt Quantity Calculation (Step-by-Step Guide) | Every Civil Engineer Should Know Accurate asphalt quantity calculation is one of the most important skills for every Highway Engineer, Civil Engineer, Quantity Surveyor, Site Engineer, and QA/QC Engineer. Whether you are preparing a BOQ, estimating material requirements, planning asphalt plant production, or verifying contractor bills, knowing the correct quantity of asphalt mix helps reduce wastage, control project costs, and ensure successful pavement construction. In this article, you’ll learn the complete asphalt quantity calculation process using a practical worked example, easy formulas, thumb rules, and professional site tips followed in highway projects.   Figure 1. Step-by-step asphalt quantity calculation for Bituminous Concrete (BC) layer. Table of Contents Why Asphalt Quantity Calculation is Important Asphalt Quantity Formula Step-by-Step Calculation Example Quick Thumb Rule Formula for Different Bituminous Layers Practical Site Tips Common Mistakes to Avoid Frequently Asked Questions Why is Asphalt Quantity Calculation Important? Accurate estimation of asphalt quantity plays a crucial role in highway construction and pavement engineering. Incorrect estimation can lead to material shortages, excessive wastage, delayed construction activities, and increased project costs. Proper asphalt quantity calculation helps engineers to: Prepare accurate BOQs and cost estimates. Estimate asphalt plant production requirements. Plan transportation of bituminous mix. Control project costs and material consumption. Verify contractor billing quantities. Reduce construction waste. Improve pavement construction quality. “`html Asphalt Quantity Formula The quantity of asphalt mix required for any pavement layer is calculated by multiplying the pavement volume by the compacted density of the approved asphalt mix. The final quantity is generally expressed in tonnes (t). Standard Formula Asphalt Quantity (Tonnes) = Length × Width × Thickness × Density Where: Parameter Unit Description Length (L) m Road length to be paved Width (W) m Finished carriageway width Thickness (T) m Compacted layer thickness Density (D) t/m³ Approved asphalt mix density from JMF Note: Always use the compacted thickness and the density approved in the Job Mix Formula (JMF). Never calculate using loose layer thickness. Step-by-Step Asphalt Quantity Calculation Let us understand the complete calculation using a practical highway engineering example. Given Data Item Value Road Length 100 m Road Width 7.50 m Bituminous Layer Thickness 50 mm Approved Asphalt Density 2.35 t/m³ Step 1 – Convert Thickness into Metres Since all dimensions should be in metres, 50 mm = 50 ÷ 1000 = 0.05 m Step 2 – Calculate Pavement Volume Volume = Length × Width × Thickness 100 × 7.5 × 0.05 Volume = 37.50 m³ Step 3 – Calculate Asphalt Quantity Multiply the pavement volume by the asphalt density. Asphalt Quantity = 37.50 × 2.35 = 88.13 Tonnes Final Answer A road measuring 100 m long and 7.5 m wide with a 50 mm compacted asphalt layer requires approximately 88.13 tonnes of asphalt mix. Quick Thumb Rule for Site Engineers For quick field estimation, use the following thumb rule. Asphalt Quantity (Tonnes) Length × Width × Thickness × Density This formula can be used for estimating the quantity of: Bituminous Concrete (BC) Dense Bituminous Macadam (DBM) Bituminous Macadam (BM) Asphalt Overlay Works Simply replace the dimensions and use the approved mix density specified in the Job Mix Formula. “`html Typical Asphalt Quantity Formula for Different Bituminous Layers The same basic calculation method is applicable to most bituminous pavement layers. The only parameter that may change is the density of the asphalt mix, which depends on the approved Job Mix Formula (JMF). Pavement Layer Calculation Formula Remarks Bituminous Concrete (BC) Length × Width × Thickness × Density Use approved BC JMF density Dense Bituminous Macadam (DBM) Length × Width × Thickness × Density Use approved DBM JMF density Bituminous Macadam (BM) Length × Width × Thickness × Density Density varies with aggregate grading Asphalt Overlay Length × Width × Thickness × Density Use compacted overlay thickness Typical Density of Asphalt Mix The density of asphalt mix is determined during the mix design process and approved through the Job Mix Formula (JMF). It varies depending on aggregate grading, binder content, air voids, and compaction characteristics. Mix Type Typical Density (t/m³) Bituminous Concrete (BC) 2.30–2.40 Dense Bituminous Macadam (DBM) 2.30–2.45 Bituminous Macadam (BM) 2.25–2.40 Important: These values are only typical ranges. Always use the density specified in the approved Job Mix Formula (JMF) for final quantity estimation and billing. Practical Tips for Highway Engineers ✔ Always calculate asphalt quantity using dimensions from the approved construction drawings. ✔ Convert layer thickness from millimetres (mm) to metres (m) before calculation. ✔ Use the compacted layer thickness, not the loose thickness after paving. ✔ Verify the approved asphalt density from the latest Job Mix Formula (JMF). ✔ Cross-check calculated quantities with asphalt plant production records. ✔ Measure the actual carriageway width before preparing final quantities. ✔ Include construction losses only when permitted by the contract or project specifications. ✔ Verify quantities jointly before preparing contractor bills. Common Mistakes to Avoid The following errors frequently result in incorrect asphalt quantity estimation: ❌ Using layer thickness in millimetres without converting to metres. ❌ Using loose paving thickness instead of compacted thickness. ❌ Assuming a standard density without checking the approved JMF. ❌ Ignoring pavement widening or variable carriageway widths. ❌ Calculating quantities from rough site measurements instead of approved drawings. ❌ Ordering asphalt mix without considering construction sequence and daily production capacity. Key Takeaways Asphalt quantity is generally measured in tonnes (t). The standard formula is Length × Width × Thickness × Density. Always use the compacted layer thickness. Use the approved Job Mix Formula (JMF) density. Accurate quantity estimation improves procurement, cost control, asphalt production planning, and contractor billing. Final quantities should always be verified with approved drawings, project specifications, and site measurements. Did You Know? A 100 m long and 7.5 m wide road with a 50 mm compacted Bituminous Concrete (BC) layer requires approximately 88.13 tonnes of asphalt mix when the approved density is 2.35 t/m³. Frequently Asked Questions (FAQs) 1. In which unit is asphalt quantity measured? Asphalt quantity is generally measured

Asphalt Quantity Calculation (Step-by-Step Guide)  Read More »

Bitumen

Ductility Test

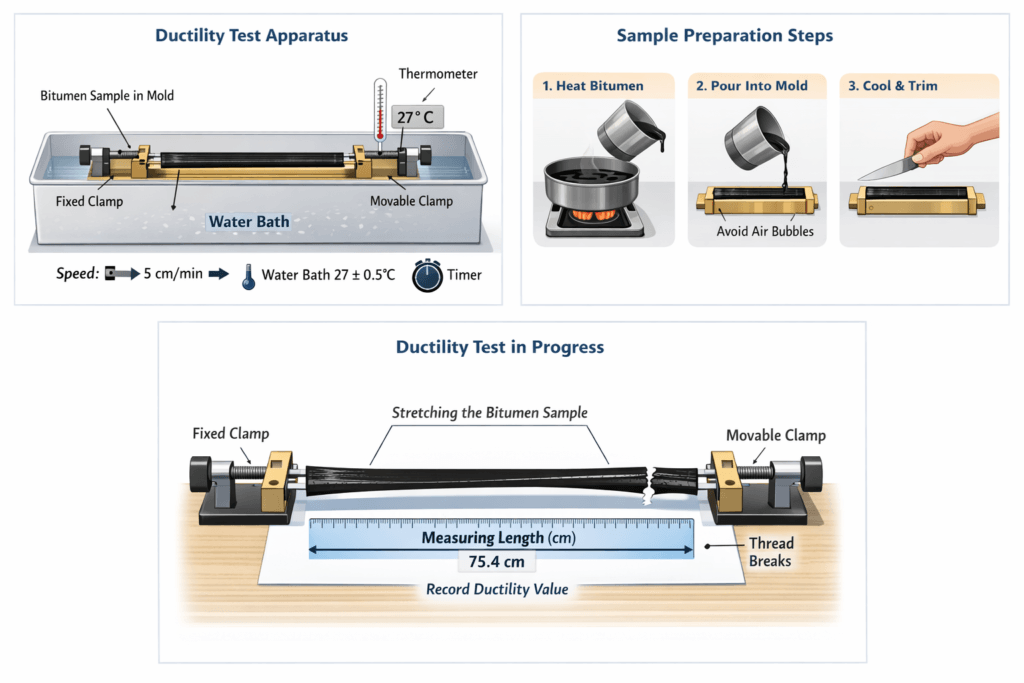
Ductility Test of Bitumen – IS 1208 Procedure, Apparatus & Results Ductility Test of Bitumen – IS 1208 Complete Guide The ductility test measures the stretching capacity of bitumen under tensile load before failure. It is a key parameter for evaluating flexibility and crack resistance in flexible pavements. Fig: Ductility test process flow Objective To determine the ductility of bituminous material i.e. its ability to stretch without breaking under standard test conditions. Apparatus Required Ductility testing machine Briquette mould Water bath (temperature controlled) Thermometer Hot knife / spatula Fig: Briquette mould assembly Sample Preparation Heat the bituminous material until it becomes completely fluid. Filter the molten bitumen through a 90-micron sieve to remove impurities. Assemble the briquette mould on a clean brass plate. Coat the brass plate and inner surfaces of the mould with a mixture of equal parts glycerine and dextrine to prevent sticking. Pour the molten bitumen slowly in a thin continuous stream from end to end of the mould until slightly overfilled. Allow the specimen to cool at room temperature for 30–40 minutes. Place the mould assembly in a water bath maintained at the specified temperature for 30 minutes. Level the surface using a hot straight-edged knife or spatula to make the mould exactly flush. Procedure (IS Standard Method) Step 1 – Standard Test Conditions Unless otherwise specified, the ductility test shall be conducted at a temperature of 25.0 ± 0.5°C and at a pulling rate of 50.0 ± 2.5 mm/min. Step 2 – Low Temperature Ductility Test When low-temperature ductility is required, the test shall be performed at 4.0 ± 0.5°C with a pulling rate of 10.0 ± 0.5 mm/min. Step 3 – Mould Conditioning Place the brass plate with mould and sample in a water bath maintained at the specified temperature. Keep it for 85–95 minutes for proper conditioning before testing. Step 4 – Specimen Preparation Remove the briquette carefully from the water bath and detach the side plates without disturbing the specimen. Step 5 – Mounting in Machine Immediately fix the specimen in the ductility testing machine by attaching the clips without applying any initial strain. Step 6 – Test Execution Pull the two clips horizontally at a uniform rate of 50 ± 2.5 mm/min until rupture occurs. Step 7 – Test Conditions Control Ensure the specimen remains fully submerged in water during the test. Water level must be at least 25 mm above and below the specimen, and temperature must remain within ±0.5°C. Result The ductility value is the distance in centimeters through which the bitumen thread stretches before breaking. Interpretation of Results High ductility: Indicates flexible, durable, and crack-resistant pavement performance. Low ductility: Indicates brittle bitumen with higher risk of pavement cracking. Limits of Ductility A35 & S35 grade bitumen: Minimum 50 cm at 27°C Other paving grades: Minimum 75 cm at 27°C Importance Ensures pavement flexibility Prevents thermal cracking Improves service life Essential for QA/QC testing Conclusion Ductility test ensures bitumen has sufficient elongation capacity to withstand traffic loads and temperature variations in highway construction. Precautions 1. If the bituminous material comes in contact with the surface of water or touches the bottom of the water bath during the test, the result shall not be considered normal. In such cases, the specific gravity of the water in the bath shall be adjusted by adding either methyl alcohol or sodium chloride, so that the bituminous material neither floats on the surface nor touches the bottom of the bath at any time during the test. 2. The plate on which the mould is placed shall be perfectly flat and level so that the bottom surface of the mould remains in full contact throughout the test. 3. While filling the mould, care shall be taken not to disturb the mould assembly, as this may distort the briquette. It shall also be ensured that no air pockets are trapped within the moulded specimen. 4. If a normal test result is not obtainable in three successive attempts, the ductility shall be reported as “unobtainable under the conditions of test.” FAQs What does ductility indicate? It indicates the ability of bitumen to stretch without breaking. Why is ductility important? It prevents cracking and improves pavement flexibility. Standard temperature? 25–27°C as per IS 1208. How is ductility measured? In centimeters of elongation before rupture. HIGHWAY QUALITY TEST Download Ductility Test of Bitumen Excel Format Prepare professional Ductility Test of Bitumen reports in minutes using our ready-to-use Excel format with automatic calculations. Accurately determine the ductility value of bitumen using the standard Ductility Test Method while eliminating manual calculation errors and generating laboratory-ready reports instantly. 💰 Only ₹99 One-Time Payment • Instant Access • Lifetime Access 🛒 Buy Ductility Test of Bitumen Excel Format ✔ Secure Payment   |   ✔ Instant Download   |   ✔ Editable Excel

Ductility Test Read More »

Bitumen
bitumen extraction

Bitumen Extraction Test – Objective, Procedure & Calculation

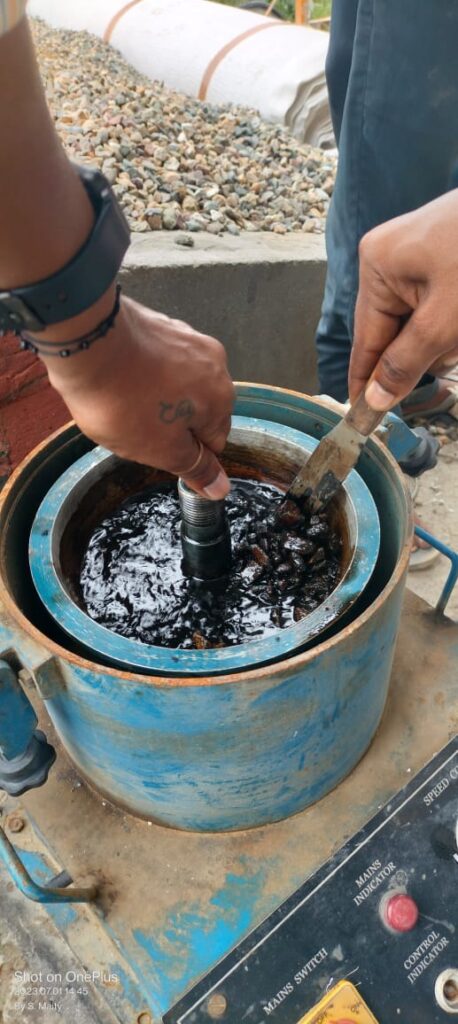
The Bitumen Extraction Test is a laboratory method used to determine the actual bitumen content present in a bituminous mix by separating the binder from aggregates using a suitable solvent. This test is essential for quality control, mix design verification, and compliance with MoRTH / IS:2720 (Part 2) and ASTM standards. Accurate bitumen content ensures proper pavement durability, strength, and resistance to deformation.

Bitumen Extraction Test – Objective, Procedure & Calculation Read More »

Bitumen, Bituminous Work
Absolute Viscosity

Absolute Viscosity Test of Bitumen as per ASTM D2171

Absolute Viscosity Test of Bitumen – ASTM D2171 Procedure & Calculation Absolute Viscosity Test of Bitumen Using Cannon-Manning Vacuum Capillary Viscometer (ASTM D2171) The Absolute Viscosity Test of Bitumen is a critical laboratory procedure used to assess the flow characteristics of paving-grade bitumen under controlled temperature and vacuum conditions. This test is essential for highway engineers, laboratory technicians, and quality control professionals who need accurate and reproducible data on bitumen viscosity. Using a Cannon-Manning Vacuum Capillary Viscometer, the test measures the time it takes for a bitumen sample to flow through a capillary tube, which is then converted into absolute viscosity using a calibrated factor. Performing this test correctly ensures that the selected bitumen will perform effectively under traffic loads and varying climatic conditions. 1. OBJECTIVE The main goal of this test is to determine the absolute viscosity of bitumen at a standard temperature of 60 °C under a vacuum of 30 cm Hg. Viscosity measurement is critical for: Ensuring proper workability of asphalt during mixing and laying. Predicting rutting and deformation resistance of pavement. Verifying consistency and quality of paving-grade bitumen. Comparing bitumen from different suppliers. 2. THEORY Bitumen is a viscoelastic material, meaning its resistance to flow depends on temperature and load. The absolute viscosity represents its internal resistance to flow under laminar conditions. The Cannon-Manning Vacuum Capillary Viscometer determines this property by: Allowing bitumen to flow through a narrow capillary under vacuum. Recording the flow time between two calibrated marks. Multiplying the flow time with the viscometer’s calibration factor (K) to calculate viscosity in Poises. Using a vacuum helps remove air bubbles and ensures smooth laminar flow, which is essential for accurate results. The ASTM D2171 standard ensures consistency and repeatability in viscosity measurements across different laboratories and projects. 3. APPARATUS Constant Temperature Bath (water up to 100 °C or silicone oil up to 150 °C) with ±0.1 °C accuracy. Vacuum pump and manometer capable of maintaining 30 cm Hg with ±0.05 cm Hg accuracy. Cannon-Manning Vacuum Capillary Viscometer (Size 12 or 13 depending on bitumen grade). Stopwatch with 0.5-second accuracy. Viscometer stand for holding up to 6 tubes. Thermometer for monitoring sample and bath temperature. Glassware and safety equipment such as tongs, gloves, and goggles. Note: All apparatus should be clean, dry, and calibrated according to the manufacturer’s specifications to ensure accurate measurements. 4. PROCEDURE Sample Collection: Collect a representative bitumen sample (~50 g) in a clean container and stir gently to ensure homogeneity. Heating: Heat the sample to 135 ± 5.5 °C using a water or silicone oil bath. Avoid overheating to prevent oxidation of bitumen. Filling Viscometer: Carefully pour the heated bitumen into the viscometer up to the fill mark (Line E ±2 mm). Standing Period: Let the viscometer stand for 10 ± 2 minutes to allow trapped air bubbles to escape. Immersion in Bath: Place the viscometer in the constant temperature bath maintained at 60 °C. Ensure it is suspended and does not touch the bottom of the bath. Vacuum Application: Connect the viscometer to the vacuum pump and apply 30 cm Hg vacuum. Verify the reading on the manometer. Timing Flow: Start the stopwatch as the bitumen reaches Mark G and stop when it reaches Mark H. Record the flow time (T seconds). Repeat: Perform at least three measurements per sample and calculate the average flow time for accuracy. Tips for Accuracy: Avoid shaking the viscometer, maintain bath temperature ±0.1 °C, and ensure a stable vacuum during the test. 5. CALCULATION Formula for Absolute Viscosity Absolute Viscosity (Poises) = K × T K: Calibration factor of viscometer in Poises/sec (provided by the manufacturer). T: Flow time in seconds from Mark G to Mark H. Example: If T = 250 s and K = 12.5 Poises/sec, then Absolute Viscosity = 12.5 × 250 = 3125 Poises. 6. RESULTS The results should be reported as follows: Sample identification Bath temperature (60 °C) Vacuum applied (30 cm Hg) Flow time (T seconds) Calculated absolute viscosity (Poises) Observations (e.g., bubbles, irregular flow) Sample Temp (°C) Vacuum (cm Hg) Flow Time T (s) Absolute Viscosity (Poises) Bitumen A 60 30 250 3125 Bitumen B 60 30 200 2500 7. FACTORS AFFECTING VISCOSITY Temperature: Viscosity decreases with increasing temperature. Vacuum Accuracy: Inconsistent vacuum affects flow time. Air Bubbles: Entrapped air lowers measured viscosity. Viscometer Calibration: Must match the size and grade of bitumen. Bitumen Grade: Penetration grade and polymer-modified bitumen differ in viscosity. 8. TROUBLESHOOTING Problem Possible Cause Solution Erratic flow Air bubbles trapped in viscometer Let bitumen stand longer or reheat gently Slow flow Sample too viscous or too cold Ensure bath temperature is correct and bitumen is properly heated Vacuum drops Leaks in tubing or joints Inspect vacuum system and seal leaks Temperature fluctuates Faulty thermostat Use calibrated bath and monitor continuously Quick Reference: Absolute Viscosity Test (ASTM D2171) Standard: ASTM D2171 – Viscosity by Vacuum Capillary Viscometer Purpose: Measure flow resistance of bitumen at 60°C under vacuum Vacuum: 30 cm Hg (±0.05 cm Hg) Test Temperature: 60°C (accuracy ±0.1°C) Viscometer: Cannon-Manning (Size 12/13) Sample Heating: 135 ±5.5 °C before filling Flow Timing: Between Mark G → H Viscosity Formula: Absolute Viscosity = K × T Top FAQs – Absolute Viscosity Test of Bitumen (ASTM D2171) What is the Absolute Viscosity Test? It determines bitumen’s resistance to flow at 60°C using a vacuum capillary viscometer under 30 cm Hg vacuum, providing reliable QC data. Why is vacuum used? To remove air bubbles and ensure laminar flow, reducing measurement errors. Which viscometer is used? Cannon-Manning Vacuum Capillary Viscometer, typically Size 12 for paving grades. What is the test temperature? 60°C ±0.1°C to simulate typical bitumen service temperature. How is viscosity calculated? Viscosity = K × T, where K is the calibration factor and T is flow time in seconds. Minimum heating temperature? 135 ±5.5°C to ensure proper flow and eliminate lumps. Standing time after filling? 10 ±2 minutes to allow air bubbles to escape. Precision for timing? Stopwatch accurate to ±0.5 sec for reliable results. Typical viscosity values? 800–4000 Poises at 60°C for paving bitumen. Why 60°C? Reflects bitumen’s

Absolute Viscosity Test of Bitumen as per ASTM D2171 Read More »

Bitumen

What is Bitumen? Grade, Types, Properties

Bitumen is a viscous, black, sticky, and highly cementitious substance derived from crude petroleum through a refining process. It is primarily composed of hydrocarbons and their derivatives. Often referred to as asphalt cement in North America, bitumen is best known for its use as the binding agent in asphalt concrete for road construction, paving, and roofing applications.
________________________________________

What is Bitumen? Grade, Types, Properties Read More »

Bitumen
bitumen penetration test

Penetration Test

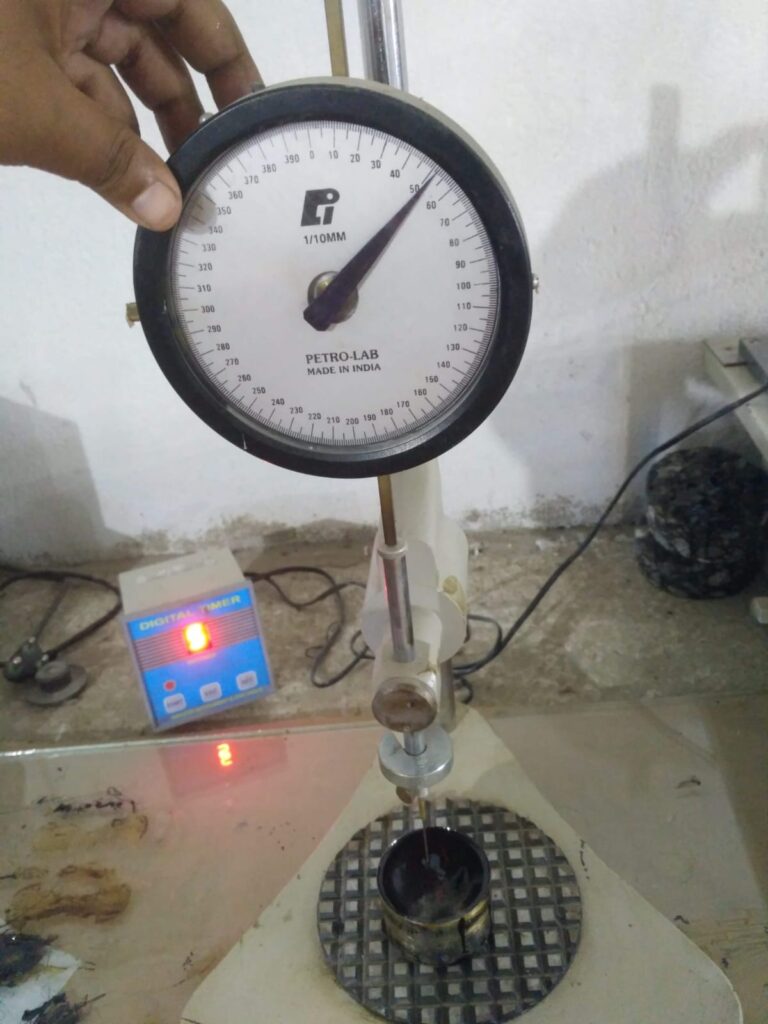
Bitumen Penetration Test – Procedure, Apparatus, Calculation & IS 1203 Limits 1. Introduction The Bitumen Penetration Test determines the hardness or softness of bitumen by measuring the depth a standard needle penetrates into the sample under specified load, time, and temperature conditions. This penetration test of bitumen is widely used in highway laboratories to determine bitumen consistency and pavement performance. 2. Definition and Standard Reference As per IS:1203 (1978) and ASTM D5, the Penetration Test determines the depth (in tenths of a millimetre) that a standard needle penetrates vertically into a bitumen sample under specific conditions of load, time, and temperature. The value obtained is known as the penetration value of the bitumen. 3. Importance of Bitumen Penetration Grade The penetration grade indicates the hardness or softness of bitumen. A higher penetration value means softer bitumen suitable for cold climates, while lower values indicate harder bitumen ideal for hot regions. Common penetration grades used in India are 30/40, 60/70, and 80/100. 4. Climate-Based Selection of Bitumen Grade Selection of bitumen grade should match the climatic conditions and traffic load. Hard grades such as VG-40 are recommended for high-temperature zones and heavy traffic, while softer grades like VG-10 are preferred in colder regions. 5. Penetration Test Apparatus for Bitumen Penetrometer with standard needle Water bath maintained at 25°C ± 0.1°C Sample container (metal cup) Thermometer (accurate to 0.1°C) Stopwatch 6. Sample Preparation Procedure Heat the bitumen sample to a pouring consistency (not exceeding 90°C). Pour the sample into a metal cup to a depth of about 35 mm and allow it to cool for 1 to 1.5 hours at room temperature. Place the sample in a water bath maintained at 25°C for at least 1 hour before testing. 7. Bitumen Penetration Test Procedure (IS 1203) Place the sample under the penetrometer needle. Ensure the needle just touches the surface of the bitumen. Apply a load of 100 g for 5 seconds. Note the penetration value in tenths of a millimetre (dmm). Repeat the test at three different points not less than 10 mm apart. Calculate the average value as the final result. 8. Calculation of Penetration Value Penetration Value (dmm) = Average of three readings Example: (67 + 68 + 69) / 3 = 68 dmm 9. Importance of the Heating Process Heating bitumen must be carefully controlled to prevent oxidation and hardening. Excessive heating alters bitumen’s chemical properties, reducing penetration value and flexibility. Purpose of Heating To bring the bitumen to a fluid state for easy pouring and uniform temperature distribution without causing aging or volatility loss. The 90°C Rule – Preventing Age Hardening Bitumen should never be heated beyond 90°C during sample preparation. Higher temperatures accelerate oxidation and make the bitumen brittle, leading to premature pavement cracking. Pro Tips Always stir the sample gently while heating. Use a controlled water bath for uniform test temperature. Record temperature before and after the test to ensure consistency. Penetration Grades of Bitumen Bitumen Grade Penetration Range (dmm) Typical Use 30/40 30–40 Heavy traffic roads 60/70 60–70 Highway construction 80/100 80–100 Cold climate regions 10. Importance of Bitumen Hardness Test in Road Construction This test ensures that the bitumen used in road construction meets design requirements for flexibility, binding strength, and temperature susceptibility. a. Quality Control Helps verify that the bitumen supplied on site matches the approved specification before mixing. b. Performance Prediction Indicates how bitumen will behave under traffic and climatic stress conditions. c. Consistency Indicator Shows the relative hardness or softness of bitumen, which influences pavement flexibility. d. Prevents Premature Failures Using bitumen of correct penetration value minimizes cracking, rutting, and bleeding in pavements. 11. Final Thoughts The Bitumen Penetration Test is an essential quality control measure that defines the usability and performance of paving bitumen. Engineers use this penetration test of bitumen to select the correct grade for durable and flexible road pavements. By maintaining the correct penetration value, highway engineers can ensure durable and flexible pavements suited to Indian climatic conditions. ✅ Expert Tip Always cross-check penetration test results with the Softening Point Test of Bitumen (IS 1205) to understand bitumen behaviour under temperature variations. Frequently Asked Questions What is IS 1203 penetration test? The IS 1203 penetration test is a laboratory method used to determine the hardness or softness of bitumen by measuring the depth a standard needle penetrates under a load of 100 g for 5 seconds at 25°C. The penetration value indicates the hardness or softness of bitumen measured as the depth a standard needle penetrates under specified conditions. What is the standard load used in penetration test? The standard load used in the penetration test is 100 grams applied for 5 seconds. What is IS 1203 penetration test? The penetration test of bitumen is conducted as per IS 1203. Related Bitumen and Pavement Tests In highway quality control laboratories, the penetration test is usually conducted along with other important bitumen and pavement tests to evaluate the overall performance of road materials. Related Bitumen & Pavement Tests Softening Point Test of Bitumen (IS 1205) Marshall Stability & Flow Test – Procedure & MoRTH Limits Ductility Test of Bitumen Bitumen Viscosity Test (IS 1206) California Bearing Ratio (CBR) Test Flakiness Index Test of Aggregates Modified Proctor Compaction Test Consistency of Cement Test

Penetration Test Read More »

Bitumen

© 2026 HIGHWAY QUALITY TEST. All rights reserved.

WhatsAppNeed Help?
Scroll to Top