HIGHWAY QUALITY TEST

Precision Testing. Proven Quality. Safer Infrastructure.

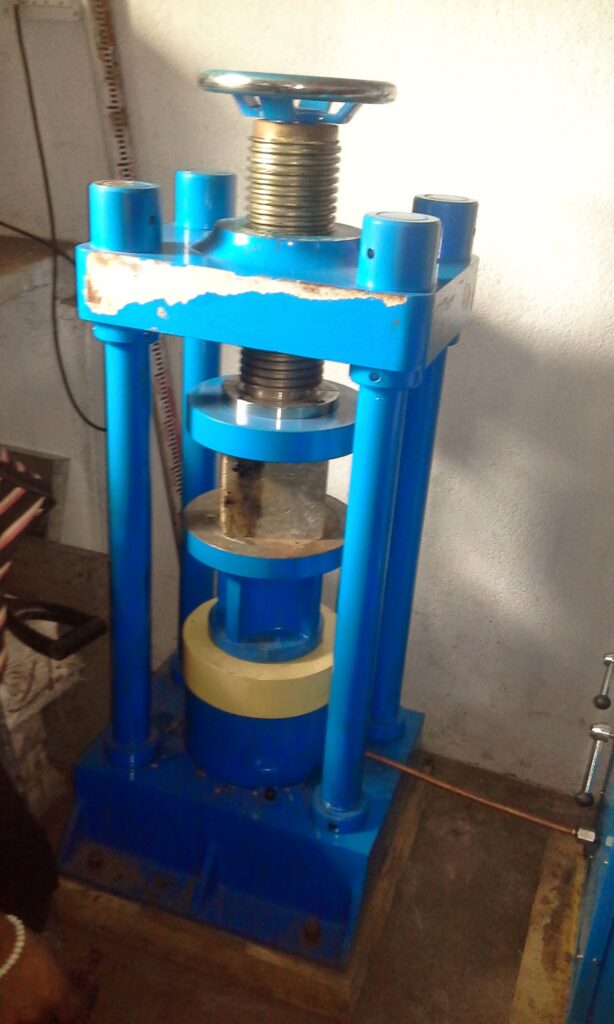
cube testing machine

Compressive Strength of Concrete Cube Test (IS 516 Guide)

Concrete Cube Test – IS 516 Procedure, Compressive Strength & Formula 1. Objective The Concrete Cube Compressive Strength Test, conducted in accordance with IS 516 (Part 1/Sec 1), is the most widely accepted method for assessing the compressive strength of hardened concrete. It is one of the most critical quality control tests used to verify that concrete has achieved the specified design strength and complies with the requirements of IS 456, MoRTH Specifications, project specifications, and contractual acceptance criteria. The test is routinely performed on highways, bridges, buildings, industrial facilities, airports, and other infrastructure projects to ensure the structural safety, durability, and long-term performance of concrete. For EPC contractors, consultants, and QA/QC teams, concrete cube testing forms an integral part of the Quality Assurance and Quality Control (QA/QC) system. The reliability of the test depends not only on the Compression Testing Machine (CTM) but also on the accuracy of every preceding activity, including representative sampling, cube casting, compaction, curing, specimen handling, identification, and laboratory testing. Failure to follow standard procedures at any stage can significantly influence the measured compressive strength and may result in incorrect acceptance or rejection of concrete. Concrete test specimens are generally prepared using standard cube moulds of 150 × 150 × 150 mm, which are widely used for routine structural concrete testing. Where the nominal maximum size of coarse aggregate does not exceed 20 mm, 100 × 100 × 100 mm cube moulds may also be used in accordance with the applicable provisions of IS 516. Specimens are normally tested at 7 days to evaluate early strength development and at 28 days to determine the characteristic compressive strength. Additional testing ages may be specified for high-performance concrete, mass concrete, or project-specific requirements. Scope of the Concrete Cube Test Procedure A standard Concrete Cube Compressive Strength Test consists of the following sequential activities: Inspection, cleaning, assembly, and lubrication of cube moulds before casting. Collection of representative fresh concrete samples from the point of discharge or placement. Recording of specimen identification, concrete grade, batch details, casting location, date, and time for complete traceability. Layer-wise placement of concrete into cube moulds followed by proper compaction using a tamping rod or vibration table, depending on the workability of the concrete. Finishing the top surface flush with the mould and marking each specimen for identification. Protecting freshly cast specimens from vibration, direct sunlight, excessive moisture loss, and mechanical disturbance during the initial setting period. Demoulding the specimens after 24 ± ½ hours and transferring them immediately to a curing tank maintained under standard curing conditions. Continuous water curing until the specified testing age. Testing the specimens using a calibrated Compression Testing Machine (CTM) in accordance with IS 516. Calculating the compressive strength by dividing the maximum failure load by the loaded cross-sectional area of the specimen. Comparing the test results with the acceptance criteria specified in IS 456, MoRTH Specifications, project Quality Assurance Plans (QAP), and other applicable contract documents. Importance of Proper Testing The accuracy of the Concrete Cube Compressive Strength Test depends on strict adherence to standard laboratory procedures. Common errors such as improper sampling, inadequate compaction, poor curing, damaged specimens, incorrect loading rates, or inaccurate specimen identification can produce misleading test results. Therefore, every stage of the testing process shall be carried out in accordance with IS 516 and the approved Quality Assurance procedures to ensure reliable, repeatable, and technically valid results. Benefits of Routine Concrete Cube Testing Verifies that the concrete has achieved the specified grade (M20, M25, M30, M40, and higher). Detects deficiencies in batching, mixing, transportation, placement, compaction, and curing practices at an early stage. Evaluates the consistency and quality of concrete production throughout the project. Confirms the performance of the approved concrete mix design under actual site conditions. Demonstrates compliance with IS 456, IS 516, MoRTH Specifications, consultant requirements, and contractual QA/QC procedures. Provides documented laboratory records for inspections, audits, quality reviews, and client approvals. Enhances confidence in the structural safety, durability, and long-term service performance of concrete structures. 👷 Expert Recommendation Concrete cube strength should never be evaluated in isolation. When low-strength results are obtained, review the complete quality control cycle, including material quality, batching accuracy, water-cement ratio, slump test results, transportation time, placing method, compaction, curing conditions, CTM calibration, and testing procedures. In practice, many low-strength results are caused by deficiencies in sampling, specimen preparation, curing, or testing rather than by the concrete mix itself. A systematic investigation should always be carried out before concluding that the concrete has failed. This guide presents the complete IS 516 Concrete Cube Compressive Strength Test Procedure in a practical, step-by-step sequence followed on major NHAI, MoRTH, EPC, HAM, BOT, and O&M projects. It is intended as a comprehensive reference for site engineers, material engineers, QA/QC engineers, laboratory technicians, consultants, contractors, engineering students, and project managers responsible for concrete quality control and acceptance testing. 2. Apparatus Required The following apparatus and equipment are required for casting, curing, and testing concrete cube specimens in accordance with IS 516 (Part 1/Sec 1). All equipment shall be clean, properly maintained, and calibrated (where applicable) to ensure accurate and reliable test results. Apparatus Specification / Requirement Purpose Cube Moulds 150 × 150 × 150 mm or 100 × 100 × 100 mm, steel/cast iron Preparation of standard concrete test specimens. Mixing Tray Clean, rigid and non-absorbent Mixing and remixing representative concrete samples before casting. Scoop / Shovel Steel Handling and transferring fresh concrete into cube moulds. Tamping Rod 16 mm diameter, 600 mm long, rounded ends Manual compaction of concrete (35 strokes per layer as specified). Steel Trowel / Float Standard masonry trowel Levelling and finishing the top surface of the concrete cube. Vibrating Table or Needle Vibrator Suitable capacity Mechanical compaction of workable concrete where specified. Concrete Mixer (If Required) Pan or drum type Uniform mixing of concrete for laboratory or trial batches. Vernier Caliper / Steel Scale Calibrated Measurement of cube dimensions before compressive strength testing. Curing Tank Maintained at 27 ± 2°C Standard water curing of

Compressive Strength of Concrete Cube Test (IS 516 Guide) Read More »

Concrete Work

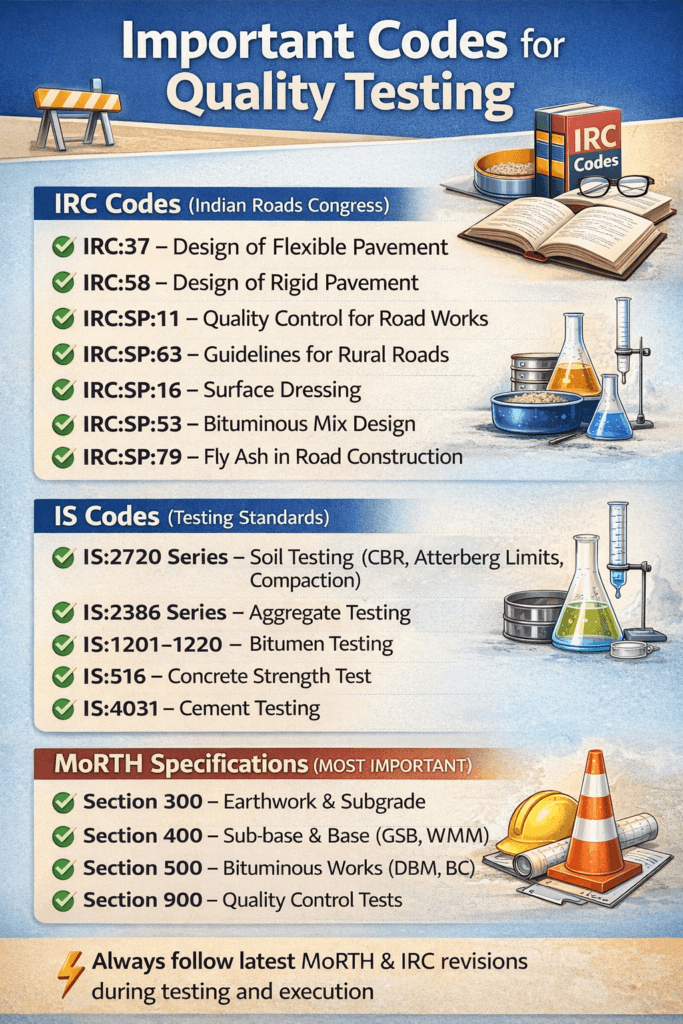
Important IS & IRC Codes for Highway Engineers

Important IS & IRC Codes for Highway, Site and QA/QC Lab Engineers ⚡ Quick Summary ✔ Complete reference to the most important IS & IRC codes used in civil and highway material testing. ✔ Find the correct standard for testing concrete, aggregates, soil, bitumen, cement, steel, and pavement materials. ✔ Ensure compliance with MoRTH, IRC, NHAI, and project quality requirements. ✔ Reduce testing errors by selecting the appropriate IS/IRC code for every laboratory and field test. ✔ A practical guide for QA/QC engineers, material engineers, consultants, contractors, and engineering students. Standards and codes play a crucial role in ensuring quality and uniformity in highway construction. Every QA/QC Engineer must have basic knowledge of IS Codes, IRC Guidelines, and MoRTH Specifications to ensure proper testing and execution. 🌍 IS 2720 – Soil Testing IS 2720 (Part 1) – Preparation of soil samples IS 2720 (Part 2) – Moisture content IS 2720 (Part 3) – Specific gravity IS 2720 (Part 4) – Grain size analysis IS 2720 (Part 5) – Liquid limit IS 2720 (Part 5) – Plastic limit IS 2720 (Part 7) – Standard Proctor Test IS 2720 (Part 8) – Modified Proctor Test IS 2720 (Part 10) – UCS Test IS 2720 (Part 16) – CBR Test IS 2720 (Part 28) – Sand Replacemet Method IS 2720 (Part 40) – Free Swell Index Test 👉 Use: Subgrade and earthwork quality control 🪨 IS 2386 – Aggregate Testing IS 2386 (Part 1) – Sampling of aggregates, Flakiness & elongation index IS 2386 (Part 2) – Deleterious materials IS 2386 (Part 3) – Specific gravity & water absorption IS 2386 (Part 4) – AIV, ACV, Crushing Value IS 2386 (Part 5) – Soundness of Aggregate 👉 Use: GSB, WMM, DBM & Concrete works 🛢️ IS 1200 Series – Bitumen Testing IS 1201 – Sampling of bitumen IS 1202 – DETERMINATION OF SPECIFIC GRAVITY IS 1203 – DETERMINATION OF PENETRATIONt IS 1205 – DETERMINATION OF SOFTENING POINTt IS 1206 (Part 2) – DETERMINATION OF VISCOSITY: PART II ABSOLUTE VISCOSITY IS 1206 (Part 3) – DETERMINATION OF VISCOSITY : PART III KINEMATIC VISCOSITY IS 1208 – DETERMINATION OF DUCTILITY IS 1209 – DETERMINATION OF FLASH POINT AND FIRE POINT IS 1211 – Water content 👉 Use: Bituminous layers (DBM, BC, SDBC) 🧱 IS 4031 – Cement Testing IS 4031 (Part 1) – Fineness IS 4031 (Part 3) – Soundness Test IS 4031 (Part 4) – Standard consistency IS 4031 (Part 5) – Setting time IS 4031 (Part 6) – Compressive Strength 👉 Use: Concrete and structural works 📘 MoRTH Specifications for Road & Bridge Works Official technical specifications published by the Ministry of Road Transport and Highways (MoRTH) for the construction and maintenance of roads and bridges in India. Defines requirements for materials, workmanship, construction procedures, quality control, acceptance criteria, testing frequency, and permissible tolerances. Forms the primary contractual reference for NHAI, State Highway Authorities, EPC, HAM, BOT, and O&M highway projects. Works together with IRC Standards and relevant IS Codes to ensure quality, safety, durability, and compliance throughout the project lifecycle. 👉 Primary Use: Material approval, construction methodology, laboratory and field testing, quality assurance (QA), quality control (QC), inspection, measurement, and acceptance of highway works. 🛣️ IRC Standards & Guidelines Published by the Indian Roads Congress (IRC), the apex technical body for road and bridge engineering standards in India. Provides comprehensive standards for geometric design, pavement design, traffic engineering, road safety, bridges, drainage, maintenance, and rehabilitation. Includes recommended practices, design criteria, testing procedures, and construction guidelines for national and state highway projects. Used in conjunction with MoRTH Specifications and relevant IS Codes to achieve technically compliant and high-quality highway infrastructure. 👉 Primary Use: Highway planning, pavement design, construction, maintenance, road safety, material testing, and quality assurance (QA/QC). ⚠️ Important Note Always use the latest revisions of IS Codes, IRC Standards, and MoRTH Specifications applicable to your project or contract. Superseded or outdated standards may result in non-compliance, failed inspections, rework, delayed approvals, or rejection by the Engineer/Authority. 💡 Best Practice: Before conducting any laboratory or field test, verify the applicable MoRTH Clause, corresponding IRC Standard, and relevant IS Code. Maintain updated digital and printed copies of these standards for quick reference during testing, inspections, quality audits, and project execution.

Important IS & IRC Codes for Highway Engineers Read More »

FAQ/Interview
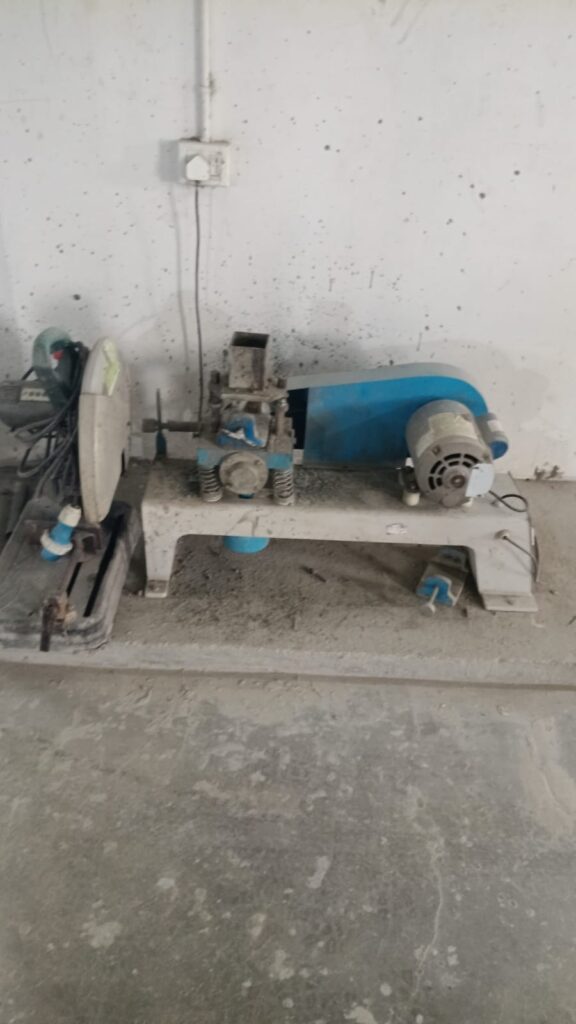
Mortar cube vibrator

Compressive Strength of Cement

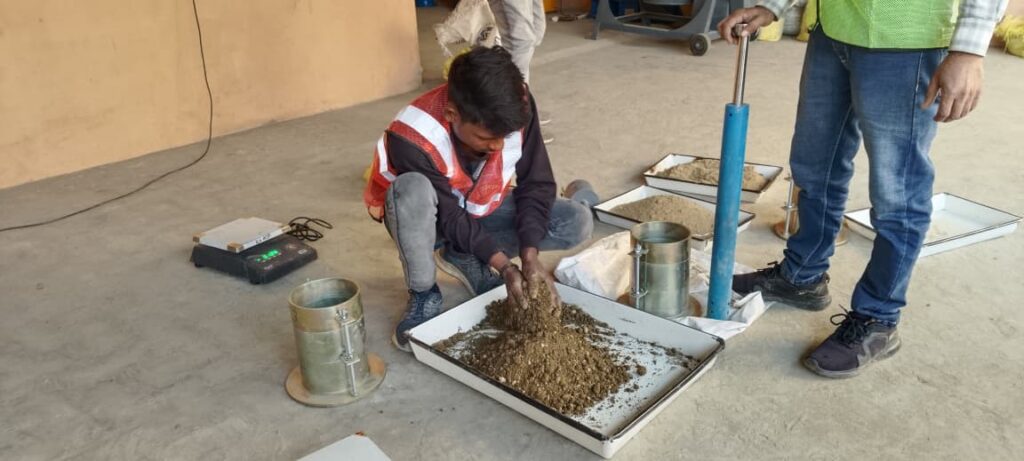
Compressive Strength Test of Cement Mortar Cubes – IS 4031 (Part 6) | Step-by-Step with Examples Compressive Strength Test of Cement Mortar Cubes (IS: 4031 – Part 6) Quick Summary: IS:4031 (Part-6) specifies the method for determination of compressive strength of cement using standard mortar cubes of size 70.6 mm. Cubes are prepared in a 1:3 cement–standard sand mix, compacted by vibration, cured for 3, 7 and 28 days, and tested at a loading rate of 35 N/mm²/min. The test ensures that cement meets the minimum strength requirements prescribed for OPC-43 and OPC-53 grades. Example: This test is used to check whether an OPC 43 or OPC 53 cement bag supplied to site meets BIS strength requirements at 3, 7 and 28 days. 1. Intoduction: To determine the compressive strength of hydraulic cement, standard cement mortar cubes (70.6 mm size) are cast and compacted using a standard vibration machine as per IS 4031 (Part 6). This Compressive Strength Test ensures cement quality by covering cube casting, curing, testing, calculation, and result interpretation, making it field-ready for engineers and QA/QC teams to ensure reliable concrete performance in highway and structural applications. 2. Apparatus Vibration machine (12,000 ± 400 vibrations/min) Cube moulds – 70.6 mm × 70.6 mm × 70.6 mm Standard sand (IS 650 : 1966) Prodding rod Non-porous mixing plate Weighing balance Cube crushing testing machine (CTM) Mould oil, petroleum jelly Potable / distilled water Example: If your CTM capacity is 2000 kN and vibration machine speed is calibrated annually, the setup satisfies IS requirements. 3. Standard Sand (IS 650) Particle Size Range Percentage 2.0 mm – 1.0 mm 33.33% 1.0 mm – 500 micron 33.33% 500 micron – 90 micron 33.33% Example: If 900 g of standard sand is tested for gradation, each fraction should weigh approximately 300 g. 4. Mix Proportion Material Quantity Cement 200 g Standard Sand 600 g Water (P/4 + 3)% P = % water required for standard consistency (IS 4031 Part 4) Example: If standard consistency P = 26% Water = (26/4 + 3)% = 9.5% Total mass = 800 g Water = 0.095 × 800 = 76 g 5. Mixing Procedure Dry mix cement + sand for 1 minute. Add calculated water. Mix for minimum 3 minutes. Reject mix if uniform colour is not achieved within 4 minutes. Example: Dry mixing from 10:00–10:01 AM Wet mixing ends at 10:04 AM → ACCEPTABLE If mixing continues beyond 10:05 AM → REJECT batch 6. Moulding of Specimens Oil mould and base plate. Fix mould firmly on vibration table. Fill mortar in layers. Prod each layer 20 times in ~8 seconds. Vibrate for 2 minutes. Finish surface using trowel. Example: 1st layer: 20 rod blows in 8 s 2nd layer: 20 rod blows in 8 s Vibration time: 2 minutes exactly 7. Curing of Specimens Keep moulds in moist room for 24 hours. Demould and immerse in water. Maintain water temperature at 27 ± 2°C. Renew water every 7 days. Example: Casting completed at 4 PM on Day-0 Demould at 4 PM on Day-1 3-day test conducted at 4 PM on Day-3 8. Testing of Specimens Test cubes on their sides. Load rate: 35 N/mm² per minute. Test minimum three cubes. Example: For cube area 50 cm² (=5000 mm²), Load rate ≈ 175 kN per minute 9. Calculation of Compressive Strength Compressive Strength = P / A Example (kg-machine): Crushing load = 7200 kg Area = 50 cm² Strength = 7200 / 50 = 144 kg/cm² Example (kN-machine): Load = 720 kN Equivalent load = 720 × 101.97 = 73418 kg Strength = 73418 / 50 = 1468 kg/cm² 10. Minimum Strength Requirements OPC 43 Grade Cement Age Strength (MPa) kg/cm² 3 Days 23 235 7 Days 33 337 28 Days 43 438 OPC 53 Grade Cement Age Strength (MPa) kg/cm² 3 Days 27 275 7 Days 37 377 28 Days 53 540 ⬇ Download Cement Mortar Cube Test – Excel Sheet Top 10 FAQs – Compressive Strength of Cement What is the compressive strength of cement? It is the maximum load per unit area that a cement mortar cube can withstand under compression. Which IS code governs the compressive strength test of cement? IS:4031 (Part-6) specifies the procedure for determination of compressive strength of cement. Why is standard sand used in cement strength testing? Standard sand (IS:650) ensures uniform grading and repeatable test results. What is the size of cement mortar cube? Standard cube size is 70.6 mm × 70.6 mm × 70.6 mm with a cross-sectional area of 50 cm². What is the mix proportion for cement mortar cubes? Cement : Standard Sand = 1 : 3 by weight. How is water quantity calculated? Water = (P/4 + 3)% of the combined weight of cement and sand, where P is the standard consistency. What are standard curing periods? Cement mortar cubes are tested at 3 days, 7 days, and 28 days. What is the required compressive strength for OPC cement? OPC-43: 23, 33, 43 MPa and OPC-53: 27, 37, 53 MPa at 3, 7, and 28 days respectively. How is compressive strength calculated? Strength (kg/cm²) = Crushing Load (kg) / Area (cm²). Can a compression testing machine display load in kN? Yes. Load in kN must be converted into kg before calculating strength. Prepared by Kishor Kumar | Source: HighwayQualityTest.com Standard Reference: IS 4031 (Part 6) – Methods of Physical Tests for Hydraulic Cement (BIS). Quick Reference: Compressive Strength of Cement (IS:4031 Part-6) Test Objective: Determine compressive strength of standard cement mortar cubes Specimen Size: 70.6 mm × 70.6 mm cube (area = 50 cm²) Mix Proportion: Cement : Standard Sand = 1 : 3 by weight Quantity per Cube Set: Cement = 200 g, Sand = 600 g Water Content: (P/4 + 3)% of combined mass of cement and sand Standard Sand: Conforming to IS:650 (100% passing 2 mm, retained on 90 micron) Compaction: Vibration for 2 minutes @ 12,000 ± 400 vibrations/min Curing Periods: 3 days, 7 days & 28 days

Compressive Strength of Cement Read More »

Cement

Ductility Test

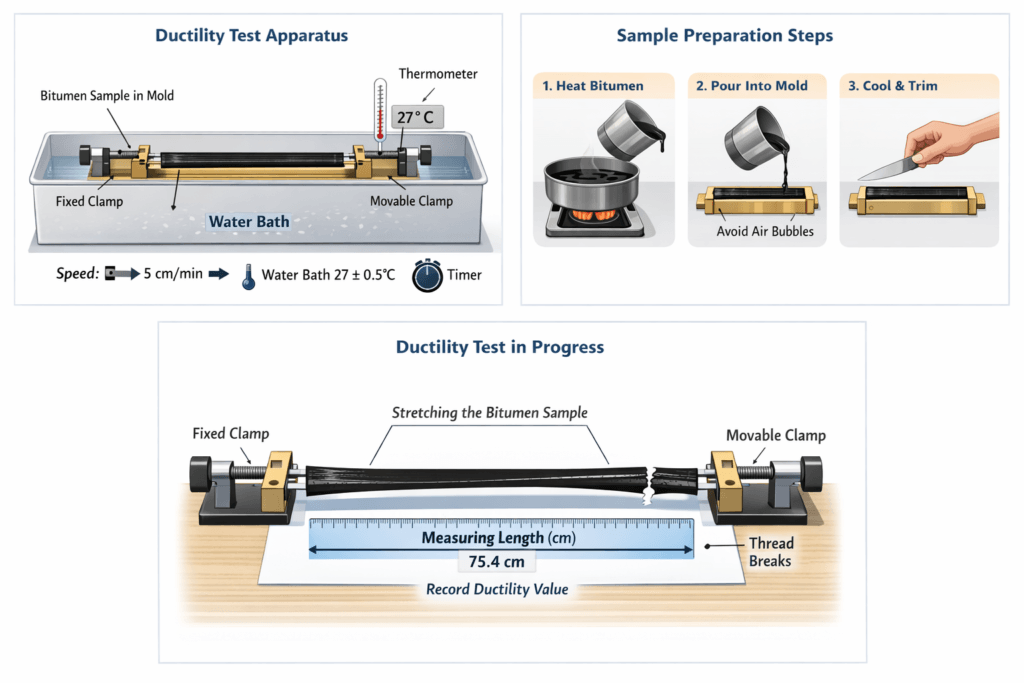
Ductility Test of Bitumen – IS 1208 Procedure, Apparatus & Results Ductility Test of Bitumen – IS 1208 Complete Guide The ductility test measures the stretching capacity of bitumen under tensile load before failure. It is a key parameter for evaluating flexibility and crack resistance in flexible pavements. Fig: Ductility test process flow Objective To determine the ductility of bituminous material i.e. its ability to stretch without breaking under standard test conditions. Apparatus Required Ductility testing machine Briquette mould Water bath (temperature controlled) Thermometer Hot knife / spatula Fig: Briquette mould assembly Sample Preparation Heat the bituminous material until it becomes completely fluid. Filter the molten bitumen through a 90-micron sieve to remove impurities. Assemble the briquette mould on a clean brass plate. Coat the brass plate and inner surfaces of the mould with a mixture of equal parts glycerine and dextrine to prevent sticking. Pour the molten bitumen slowly in a thin continuous stream from end to end of the mould until slightly overfilled. Allow the specimen to cool at room temperature for 30–40 minutes. Place the mould assembly in a water bath maintained at the specified temperature for 30 minutes. Level the surface using a hot straight-edged knife or spatula to make the mould exactly flush. Procedure (IS Standard Method) Step 1 – Standard Test Conditions Unless otherwise specified, the ductility test shall be conducted at a temperature of 25.0 ± 0.5°C and at a pulling rate of 50.0 ± 2.5 mm/min. Step 2 – Low Temperature Ductility Test When low-temperature ductility is required, the test shall be performed at 4.0 ± 0.5°C with a pulling rate of 10.0 ± 0.5 mm/min. Step 3 – Mould Conditioning Place the brass plate with mould and sample in a water bath maintained at the specified temperature. Keep it for 85–95 minutes for proper conditioning before testing. Step 4 – Specimen Preparation Remove the briquette carefully from the water bath and detach the side plates without disturbing the specimen. Step 5 – Mounting in Machine Immediately fix the specimen in the ductility testing machine by attaching the clips without applying any initial strain. Step 6 – Test Execution Pull the two clips horizontally at a uniform rate of 50 ± 2.5 mm/min until rupture occurs. Step 7 – Test Conditions Control Ensure the specimen remains fully submerged in water during the test. Water level must be at least 25 mm above and below the specimen, and temperature must remain within ±0.5°C. Result The ductility value is the distance in centimeters through which the bitumen thread stretches before breaking. Interpretation of Results High ductility: Indicates flexible, durable, and crack-resistant pavement performance. Low ductility: Indicates brittle bitumen with higher risk of pavement cracking. Limits of Ductility A35 & S35 grade bitumen: Minimum 50 cm at 27°C Other paving grades: Minimum 75 cm at 27°C Importance Ensures pavement flexibility Prevents thermal cracking Improves service life Essential for QA/QC testing Conclusion Ductility test ensures bitumen has sufficient elongation capacity to withstand traffic loads and temperature variations in highway construction. Precautions 1. If the bituminous material comes in contact with the surface of water or touches the bottom of the water bath during the test, the result shall not be considered normal. In such cases, the specific gravity of the water in the bath shall be adjusted by adding either methyl alcohol or sodium chloride, so that the bituminous material neither floats on the surface nor touches the bottom of the bath at any time during the test. 2. The plate on which the mould is placed shall be perfectly flat and level so that the bottom surface of the mould remains in full contact throughout the test. 3. While filling the mould, care shall be taken not to disturb the mould assembly, as this may distort the briquette. It shall also be ensured that no air pockets are trapped within the moulded specimen. 4. If a normal test result is not obtainable in three successive attempts, the ductility shall be reported as “unobtainable under the conditions of test.” FAQs What does ductility indicate? It indicates the ability of bitumen to stretch without breaking. Why is ductility important? It prevents cracking and improves pavement flexibility. Standard temperature? 25–27°C as per IS 1208. How is ductility measured? In centimeters of elongation before rupture. HIGHWAY QUALITY TEST Download Ductility Test of Bitumen Excel Format Prepare professional Ductility Test of Bitumen reports in minutes using our ready-to-use Excel format with automatic calculations. Accurately determine the ductility value of bitumen using the standard Ductility Test Method while eliminating manual calculation errors and generating laboratory-ready reports instantly. 💰 Only ₹99 One-Time Payment • Instant Access • Lifetime Access 🛒 Buy Ductility Test of Bitumen Excel Format ✔ Secure Payment   |   ✔ Instant Download   |   ✔ Editable Excel

Ductility Test Read More »

Bitumen

Wet Aggregate Impact Value Test | IS Procedure & Calculation

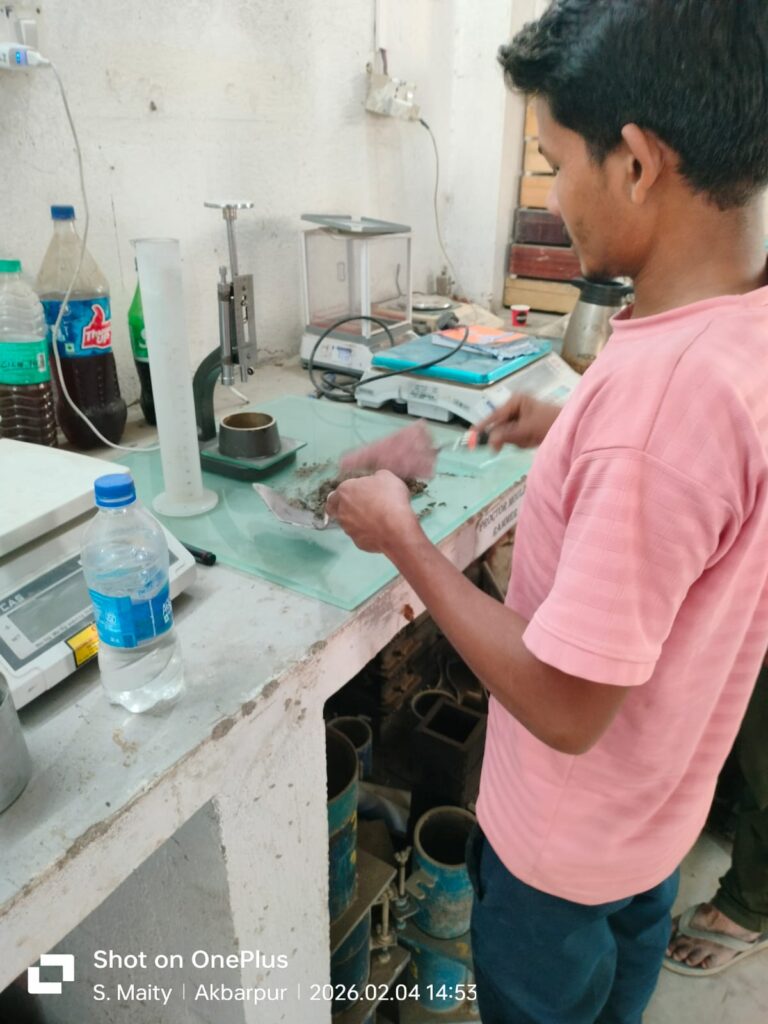
Wet Aggregate Impact Value Test OBJECT To determine the Aggregate Impact value of coarse Aggregate. APPARATUS AIV machine, IS Sieve 12.5mm, 10.0mm, 2.36mm, Oven, Brush, Balance 0.1 gm accuracy. PROCEDURE The test sample shall consist of aggregate the whole of which passes a 12.5-mm IS Sieve and retained on 10 mm IS Sieve. The aggregate comprising the test sample shall be dried in an oven for a period of four hours; the weight becomes constant at a temperature of 105 to 110°C and cooled. The measure shall be filled about one-third full with the aggregate and tamped with 25 strokes of the rounded end of the tamping rod. A further similar quantity of aggregate shall be added and a further tamping of 25 strokes given. The measure shall finally be filled to overflowing, tamped 25 times and the surplus aggregate struck off, using the tamping rod as a straight-edge. The net weight of aggregate in the measure shall be determined to the nearest gram (weight A) and this weight of aggregate shall be used for the duplicate test on the same material. This oven-dried sample is immersed in water for three days. Wet sample after the immersion period is surface dried by suitable cloth. The cup shall be fixed firmly in position on the base of the machine and the whole of the test sample placed in it and compacted by a single tamping of 25 strokes of the tamping rod. The hammer shall be raised until its lower face is 350 mm above the upper surface of the aggregate in the cup, and allowed to fall freely onto the aggregate. The test sample shall be subjected to a total of 15 such blows each being delivered at an interval of not less than one second. The crushed aggregate shall then be removed from the cup and the whole of it sieved on the 2.36 mm IS Sieve and washed with water till no further significant amount passes in one minute. The fraction retained on the sieve shall be dried in an oven to the constant weight at 105 to 110°C and weighed to an accuracy of 0.1 g (weight B). The fraction retained on the sieve (weight B) shall be subtracted from the weight of the original oven dried sample (weight A). The resultant weight (weight A – weight B) shall represent the fraction passing 2.36 mm IS Sieve (weight C). Two tests shall be made. CALCULATION Aggregate Impact Value = (C / A) × 100 Where: C = Weight of fines formed A = Weight of the oven-dried sample

Wet Aggregate Impact Value Test | IS Procedure & Calculation Read More »

Aggregate

© 2026 HIGHWAY QUALITY TEST. All rights reserved.

WhatsAppNeed Help?
Scroll to Top