DBM Construction

DBM laying work

DBM is flexible pavement and composed of coarse aggregates, bitumen, and filler. It provides strength and durability to the road. DBM is laid in one or more layers, typically 50–100 mm thick, ensuring proper compaction and uniformity as per MoRTH Clause 507 specifications.

Tack Coat in Road Construction | Methodology & IRC Guide

tackcoat spraying

Tack Coat Methodology as per MoRTH Clause 503 | Highway Quality Test Tack Coat Methodology (MoRTH Clause 503) Author: Kishor Kumar | Category: Bituminous Works | Specification: MoRTH Clause 503 Quick Overview: Tack Coat is a thin application of rapid-setting cationic bitumen emulsion applied over a primed granular layer or existing bituminous surface to ensure proper bonding between pavement layers. Why Tack Coat Is Critical in Pavement Performance Improper tack coat application is one of the most common causes of pavement layer slippage, delamination, and premature cracking. Tack coat ensures shear resistance and structural continuity between successive bituminous layers. Quick Technical Reference Applicable Clause: MoRTH 503 (5th Revision) Material: RS-1 / RS-2 Cationic Bitumen Emulsion Application Rate: 0.20–0.30 kg/m² Surface Condition: Dry, clean, dust-free Traffic Allowance: Only after emulsion breaks Applicable Codes & Specifications MoRTH Specifications – Clause 503 IRC: SP: 84 – Manual of Specifications & Standards IS: 8887 – Bitumen Emulsion for Roads IS: 1203 – Penetration Test (Bituminous Materials) Materials Requirements Material Requirement Bitumen Emulsion RS-1 / RS-2 Cationic, IS:8887 compliant Water Not permitted for dilution unless approved Equipment Required Calibrated bitumen pressure distributor Mechanical broom / air compressor Tray for spray rate check Thermometer and spray bar adjustment system Tack Coat Application Methodology – Step by Step Verify underlying surface condition Remove dust and loose particles Check weather (no rain, dry surface) Calibrate pressure distributor Spray tack coat uniformly at approved rate Avoid streaking and overlapping Allow emulsion to break Proceed with next bituminous layer Application Rates (Acceptance Criteria) Surface Type Application Rate Existing Bituminous Surface 0.20 – 0.25 kg/m² Primed Granular Surface 0.25 – 0.30 kg/m² Curing & Traffic Control Tack coat must be allowed to break (brown to black appearance). No traffic or construction equipment shall be permitted until the surface becomes tacky and non-tracking. Quality Control Checkpoints Stage Check Acceptance Before spraying Surface cleanliness Dry & dust-free During spraying Spray rate Within specified limits After spraying Uniformity No missed patches Common Field Problems & Remedies Streaking: Poor nozzle calibration → clean & adjust spray bar Excess tack: Over-application → recalibrate distributor Peeling layers: Insufficient tack or dusty surface Tracking: Traffic allowed before breaking Safety & Best Practices Use PPE during spraying operations Ensure barricading and traffic diversion Avoid tack coat during rain or fog Maintain daily spray records Frequently Asked Questions (FAQ) What is the purpose of tack coat? To ensure proper bonding between existing and new bituminous layers. Can tack coat be applied on wet surface? No. Surface must be dry and clean. Which emulsion is used for tack coat? Rapid-setting cationic emulsion RS-1 or RS-2 as per IS:8887. How long should tack coat cure? Typically 20–30 minutes until emulsion breaks. Prepared by Highway Quality Engineers | Educational & Site-Reference Content 🏗️ Highway Construction Methodology Hub Standard construction methodologies for highway works as per MoRTH 5th Revision and IRC Specifications. ✅ Earthwork Methodology ✅ Clearing & Grubbing Methodology ➡️ ✅ Embankment Construction Methodology ➡️ ✅ Flyash Embankment Construction Methodology ➡️ ✅ Subgrade Construction Methodology ➡️ ✅ Granular Work Methodology ✅ Granular Sub-Base (GSB) Methodology ➡️ ✅ Wet Mix Macadam (WMM) Methodology ➡️ ✅ Bituminous Work Methodology ✅ Prime Coat Application Methodology ➡️ ✅ Tack Coat Application Methodology ➡️ ✅ Dense Bituminous Macadam (DBM) Methodology ➡️ ✅ Bituminous Concrete (BC) Methodology ➡️ ✅ Profile Corrective Course of DBM ➡️ ✅ Use of Waste Plastic in Bitumen ➡️ ✅ Use of Waste Plastic in Road Construction ➡️ ✅ Thermoplastic Road Marking Methodology ➡️ ✅ Concrete Methodology ✅ Dry Lean Concrete (DLC) Methodology ➡️ ✅ PQC Road Construction Methodology ➡️ ✅ Kerb Construction Methodology ➡️

Prime Coat in Road Construction (Application Method & Guidelines)

prime coat spraying

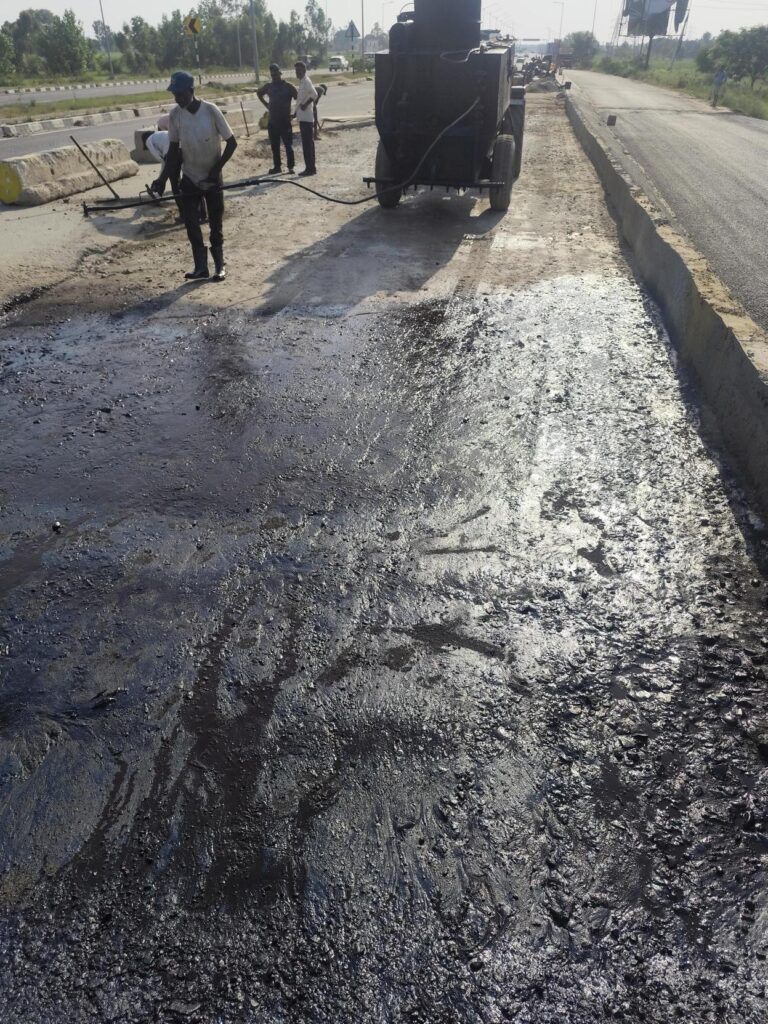
Top 8 Proven Steps for Prime Coat over WMM | MoRTH Clause 502 Top 8 Proven Steps for Prime Coat over Wet Mix Macadam (WMM) Quick Summary: Prime Coat is a low-viscosity bituminous emulsion applied over WMM to seal pores and ensure strong bonding with the next bituminous layer. As per MoRTH Clause 502, the standard application rate is 0.7–1.0 kg/m². 1. Scope of Prime Coat Prime Coat is applied over a prepared Wet Mix Macadam (WMM) base prior to laying Tack Coat and Dense Bituminous Macadam (DBM). It stabilizes the base and prevents absorption of binder from upper layers. 2. Reference Standards MoRTH Specifications – Clause 502 (5th Revision) IRC: SP: 84 – Manual of Specifications IS: 8887 – Bitumen Emulsion 3. Materials Used Cationic bitumen emulsion SS-1 or MS-1 conforming to IS:8887, approved by the Engineer with valid test certificates. 4. Equipment Required Self-propelled bitumen pressure distributor Mechanical broom or power sweeper Air compressor for dust removal Thermometer and spray gauge 5. Surface Preparation The WMM surface must be clean, dry, and free from loose particles. Light water sprinkling may be done if dusty, followed by adequate drying. 6. Application Procedure Ensure emulsion temperature as recommended. Calibrate the distributor for correct spray rate. Apply Prime Coat uniformly at 0.7–1.0 kg/m². Avoid pooling, streaking, or overlapping. 7. Curing & Traffic Restriction Allow the primed surface to cure for a minimum of 24 hours. No traffic or construction equipment shall be allowed during curing. 8. Quality Control & Inspection Check emulsion quality (IS:8887) Verify spray rate using tray test Confirm proper penetration and uniformity Quick Reference – Prime Coat Clause: MoRTH 502 Material: SS-1 / MS-1 Bitumen Emulsion Rate: 0.7–1.0 kg/m² Surface: Clean, dry WMM Curing: Minimum 24 hours FAQs – Prime Coat over WMM Why is Prime Coat required? It seals WMM pores and improves bonding with bituminous layers. Can Prime Coat be applied on wet surface? No, surface must be completely dry. Is traffic allowed after priming? No traffic until full curing. What comes after Prime Coat? Tack Coat as per MoRTH Clause 503. After Prime Coat curing, proceed with Tack Coat Application followed by DBM Construction. 🏗️ Highway Construction Methodology Hub Standard construction methodologies for highway works as per MoRTH 5th Revision and IRC Specifications. ✅ Earthwork Methodology ✅ Clearing & Grubbing Methodology ➡️ ✅ Embankment Construction Methodology ➡️ ✅ Flyash Embankment Construction Methodology ➡️ ✅ Subgrade Construction Methodology ➡️ ✅ Granular Work Methodology ✅ Granular Sub-Base (GSB) Methodology ➡️ ✅ Wet Mix Macadam (WMM) Methodology ➡️ ✅ Bituminous Work Methodology ✅ Prime Coat Application Methodology ➡️ ✅ Tack Coat Application Methodology ➡️ ✅ Dense Bituminous Macadam (DBM) Methodology ➡️ ✅ Bituminous Concrete (BC) Methodology ➡️ ✅ Profile Corrective Course of DBM ➡️ ✅ Use of Waste Plastic in Bitumen ➡️ ✅ Use of Waste Plastic in Road Construction ➡️ ✅ Thermoplastic Road Marking Methodology ➡️ ✅ Concrete Methodology ✅ Dry Lean Concrete (DLC) Methodology ➡️ ✅ PQC Road Construction Methodology ➡️ ✅ Kerb Construction Methodology ➡️

Softening Point

softening point test

Softening point is the temperature at which the substance attains a particular
degree of softening under specified conditions of test.

Penetration Test

bitumen penetration test

Bitumen Penetration Test – Procedure, Apparatus, Calculation & IS 1203 Limits 1. Introduction The Bitumen Penetration Test determines the hardness or softness of bitumen by measuring the depth a standard needle penetrates into the sample under specified load, time, and temperature conditions. This penetration test of bitumen is widely used in highway laboratories to determine bitumen consistency and pavement performance. 2. Definition and Standard Reference As per IS:1203 (1978) and ASTM D5, the Penetration Test determines the depth (in tenths of a millimetre) that a standard needle penetrates vertically into a bitumen sample under specific conditions of load, time, and temperature. The value obtained is known as the penetration value of the bitumen. 3. Importance of Bitumen Penetration Grade The penetration grade indicates the hardness or softness of bitumen. A higher penetration value means softer bitumen suitable for cold climates, while lower values indicate harder bitumen ideal for hot regions. Common penetration grades used in India are 30/40, 60/70, and 80/100. 4. Climate-Based Selection of Bitumen Grade Selection of bitumen grade should match the climatic conditions and traffic load. Hard grades such as VG-40 are recommended for high-temperature zones and heavy traffic, while softer grades like VG-10 are preferred in colder regions. 5. Penetration Test Apparatus for Bitumen Penetrometer with standard needle Water bath maintained at 25°C ± 0.1°C Sample container (metal cup) Thermometer (accurate to 0.1°C) Stopwatch 6. Sample Preparation Procedure Heat the bitumen sample to a pouring consistency (not exceeding 90°C). Pour the sample into a metal cup to a depth of about 35 mm and allow it to cool for 1 to 1.5 hours at room temperature. Place the sample in a water bath maintained at 25°C for at least 1 hour before testing. 7. Bitumen Penetration Test Procedure (IS 1203) Place the sample under the penetrometer needle. Ensure the needle just touches the surface of the bitumen. Apply a load of 100 g for 5 seconds. Note the penetration value in tenths of a millimetre (dmm). Repeat the test at three different points not less than 10 mm apart. Calculate the average value as the final result. 8. Calculation of Penetration Value Penetration Value (dmm) = Average of three readings Example: (67 + 68 + 69) / 3 = 68 dmm 9. Importance of the Heating Process Heating bitumen must be carefully controlled to prevent oxidation and hardening. Excessive heating alters bitumen’s chemical properties, reducing penetration value and flexibility. Purpose of Heating To bring the bitumen to a fluid state for easy pouring and uniform temperature distribution without causing aging or volatility loss. The 90°C Rule – Preventing Age Hardening Bitumen should never be heated beyond 90°C during sample preparation. Higher temperatures accelerate oxidation and make the bitumen brittle, leading to premature pavement cracking. Pro Tips Always stir the sample gently while heating. Use a controlled water bath for uniform test temperature. Record temperature before and after the test to ensure consistency. Penetration Grades of Bitumen Bitumen Grade Penetration Range (dmm) Typical Use 30/40 30–40 Heavy traffic roads 60/70 60–70 Highway construction 80/100 80–100 Cold climate regions 10. Importance of Bitumen Hardness Test in Road Construction This test ensures that the bitumen used in road construction meets design requirements for flexibility, binding strength, and temperature susceptibility. a. Quality Control Helps verify that the bitumen supplied on site matches the approved specification before mixing. b. Performance Prediction Indicates how bitumen will behave under traffic and climatic stress conditions. c. Consistency Indicator Shows the relative hardness or softness of bitumen, which influences pavement flexibility. d. Prevents Premature Failures Using bitumen of correct penetration value minimizes cracking, rutting, and bleeding in pavements. 11. Final Thoughts The Bitumen Penetration Test is an essential quality control measure that defines the usability and performance of paving bitumen. Engineers use this penetration test of bitumen to select the correct grade for durable and flexible road pavements. By maintaining the correct penetration value, highway engineers can ensure durable and flexible pavements suited to Indian climatic conditions. ✅ Expert Tip Always cross-check penetration test results with the Softening Point Test of Bitumen (IS 1205) to understand bitumen behaviour under temperature variations. Frequently Asked Questions What is IS 1203 penetration test? The IS 1203 penetration test is a laboratory method used to determine the hardness or softness of bitumen by measuring the depth a standard needle penetrates under a load of 100 g for 5 seconds at 25°C. The penetration value indicates the hardness or softness of bitumen measured as the depth a standard needle penetrates under specified conditions. What is the standard load used in penetration test? The standard load used in the penetration test is 100 grams applied for 5 seconds. What is IS 1203 penetration test? The penetration test of bitumen is conducted as per IS 1203. Related Bitumen and Pavement Tests In highway quality control laboratories, the penetration test is usually conducted along with other important bitumen and pavement tests to evaluate the overall performance of road materials. Related Bitumen & Pavement Tests Softening Point Test of Bitumen (IS 1205) Marshall Stability & Flow Test – Procedure & MoRTH Limits Ductility Test of Bitumen Bitumen Viscosity Test (IS 1206) California Bearing Ratio (CBR) Test Flakiness Index Test of Aggregates Modified Proctor Compaction Test Consistency of Cement Test